SearchFragment
– Android TV app hands on Tutorial 12

SearchFragment

In-app Search on Android TV application

One of the biggest difference between Android phone & Android TV is their input method. Since TV does not support touchpad, and we shouldn’t expect users to use keyboard for TV, inputting words for TV is troublesome.

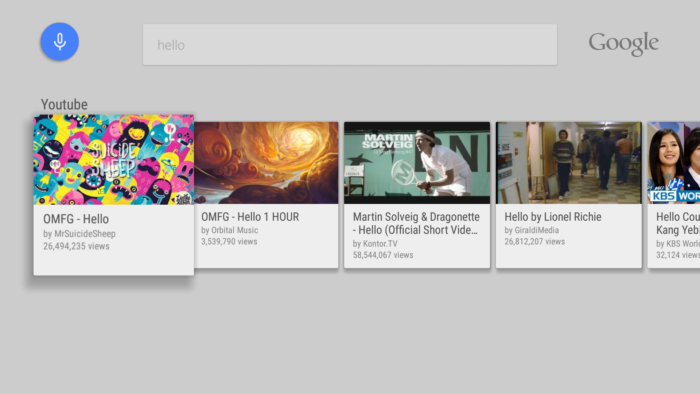
Google suggests to use voice input for in Searching within TV Apps

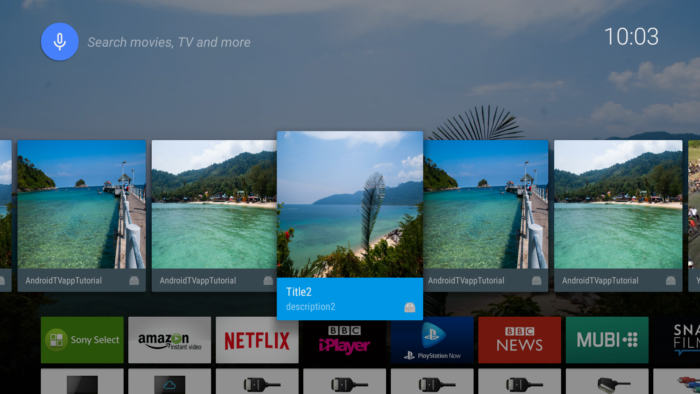
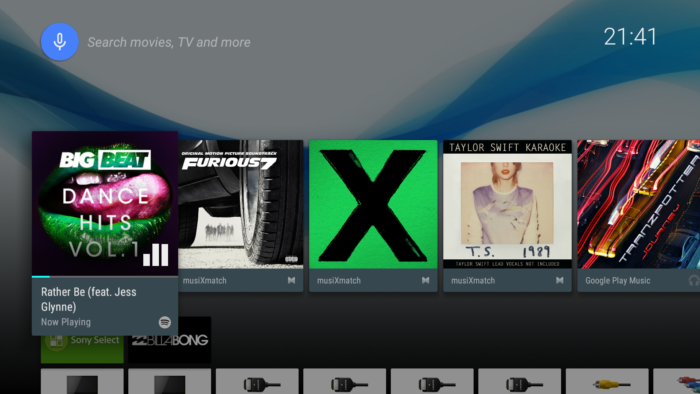
In-app Search icon on BrowseFragment

BrowseFragment contains a design layout for search function as well, and showing in-app icon on your application is very easy. Just implement setOnSearchClickedListener, that’s all.

// Existence of this method make In-app search icon visible
        setOnSearchClickedListener(new View.OnClickListener() {
            @Override
            public void onClick(View view) {
                
            }
        });

setSearchAffordanceColor method can be used for specifying search icon color.

        // set search icon color
        setSearchAffordanceColor(getResources().getColor(R.color.search_opaque));
setOnSerchClickedListener
In-app search icon will appear on the top-right of BrowseFragment when setOnSearchClickedListener is called.

SearchFragment

Search function need to be implemented to answer user’s search query. To show the search query input UI and search result UI, LeanbackLibrary provides SearchFragment. This time, when request search (by either voice search button or explicitly press search button icon), we invoke this SearchFragment from SearchActivity.

    private void setupEventListeners() {
        setOnItemViewSelectedListener(new ItemViewSelectedListener());
        setOnItemViewClickedListener(new ItemViewClickedListener());

        // Existence of this method make In-app search icon visible
        setOnSearchClickedListener(new View.OnClickListener() {
            @Override
            public void onClick(View view) {
                Intent intent = new Intent(getActivity(), SearchActivity.class);
                startActivity(intent);
            }
        });
    }

Start creating SearchActivity by right click on Package name, Create → New  Activity → Blank Activity → type “SearchActivity”. After SearchActivity class and activity_search.xml layout have created, modify res/acitivity_search.xml as follows.

<?xml version="1.0" encoding="utf-8"?>

<fragment xmlns:android="http://schemas.android.com/apk/res/android"
    android:name="com.corochann.androidtvapptutorial.SearchFragment"
    android:id="@+id/search_fragment"
    android:layout_width="match_parent"
    android:layout_height="match_parent"
    />

It attaches SearchFragment. Again, create SearchFragment by Create → New → Java class → SearchFragment, and make it a subclass of android.support.v17.leanback.app.SearchFragment.

If you build and run application here, application will crash because SearchFragment automatically start to get search query from internal speech recognizer.

Implement voice input/voice search – setSpeechRecognitionCallback

Official doc says,

If you do not supply a callback via setSpeechRecognitionCallback(SpeechRecognitionCallback), an internal speech recognizer will be used for which your application will need to request android.permission.RECORD_AUDIO.

So you need to do either

  • Implement setSpeechRecognitionCallback
  • Request android.permission.RECORD_AUDIO on AndroidManifest.xml

as follwing.

public class SearchFragment extends android.support.v17.leanback.app.SearchFragment {

    private static final String TAG = SearchFragment.class.getSimpleName();

    private static final int REQUEST_SPEECH = 0x00000010;

    @Override
    public void onCreate(Bundle savedInstanceState) {
        super.onCreate(savedInstanceState);

        if (!Utils.hasPermission(getActivity(), Manifest.permission.RECORD_AUDIO)) {
            // SpeechRecognitionCallback is not required and if not provided recognition will be handled
            // using internal speech recognizer, in which case you must have RECORD_AUDIO permission
            setSpeechRecognitionCallback(new SpeechRecognitionCallback() {
                @Override
                public void recognizeSpeech() {
                    Log.v(TAG, "recognizeSpeech");
                    try {
                        startActivityForResult(getRecognizerIntent(), REQUEST_SPEECH);
                    } catch (ActivityNotFoundException e) {
                        Log.e(TAG, "Cannot find activity for speech recognizer", e);
                    }
                }
            });
        }
    }
    public static boolean hasPermission(final Context context, final String permission) {
        return PackageManager.PERMISSION_GRANTED == context.getPackageManager().checkPermission(
                permission, context.getPackageName());
    }

Overriding onSearchRequeseted to activate in-app search

When user tries voice input search, onSearchRequested callback is executed and Google’s global contents search will be launched as default.

Voice search works with returning the result of Google’s default voice search.

It is necessary to override this method if you want to activate in-app application search.

<Ref> It is written in the description of startSearch method that 

It is typically called from onSearchRequested(), either directly from Activity.onSearchRequested() or from an overridden version in any given Activity. If your goal is simply to activate search, it is preferred to call onSearchRequested(), which may have been overridden elsewhere in your Activity. If your goal is to inject specific data such as context data, it is preferred to override onSearchRequested(), so that any callers to it will benefit from the override.

We override onSearchRequested method for both MainActivity & SearchActivity.

    @Override
    public boolean onSearchRequested() {
        startActivity(new Intent(this, SearchActivity.class));
        return true;
    }

Customize in-app search – SearchResultProvider

SearchResultProvider intereface is an intereface of Leanback library, used to listen search related event.  We need to override 3 methods.

  • getResultsAdapter – returns the adapter which includes the search results, to show search results on SearchFragment.
  • onQueryTextChange – event listener which is called when user changes search query text.
  • onQueryTextSubmit – event listener which is called when user submitted search query text. 

We need to register this SearchResultProvider by using setSearchResultProvider method,  minimum implementation is like this,

public class SearchFragment extends android.support.v17.leanback.app.SearchFragment
        implements android.support.v17.leanback.app.SearchFragment.SearchResultProvider {

    private static final String TAG = SearchFragment.class.getSimpleName();

    private static final int REQUEST_SPEECH = 0x00000010;
    private ArrayObjectAdapter mRowsAdapter;

    @Override
    public void onCreate(Bundle savedInstanceState) {
        super.onCreate(savedInstanceState);

        mRowsAdapter = new ArrayObjectAdapter(new ListRowPresenter());

        setSearchResultProvider(this);

        ...
    }

    ... 

    @Override
    public ObjectAdapter getResultsAdapter() {
        Log.d(TAG, "getResultsAdapter");
        Log.d(TAG, mRowsAdapter.toString());

        // It should return search result here,
        // but static Movie Item list will be returned here now for practice.
        ArrayList<Movie> mItems = MovieProvider.getMovieItems();
        ArrayObjectAdapter listRowAdapter = new ArrayObjectAdapter(new CardPresenter());
        listRowAdapter.addAll(0, mItems);
        HeaderItem header = new HeaderItem("Search results");
        mRowsAdapter.add(new ListRow(header, listRowAdapter));

        return mRowsAdapter;
    }

    @Override
    public boolean onQueryTextChange(String newQuery){
        Log.i(TAG, String.format("Search Query Text Change %s", newQuery));
        return true;
    }

    @Override
    public boolean onQueryTextSubmit(String query) {
        Log.i(TAG, String.format("Search Query Text Submit %s", query));
        return true;
    }

Build and run

SearchActivity can be launched in 2 ways,

  1. Explicitly click search icon of BrowseFragment.
  2. When user starts voice input search from specific controller *1 (onSearchRequested will be called.)

*1 It is depending on the Android TV devices. For example, SONY BRAVIA provides touchpad remote controller and voice search can be done from this remote controller.

SONY’s one flick touchpad remote (cited from http://www.ebay.com/itm/NEW-IN-BOX-SONY-RMF-TX100E-One-Flick-Touchpad-Remote-BRAVIA-Android-TV-2015-NFC-/151709676991)

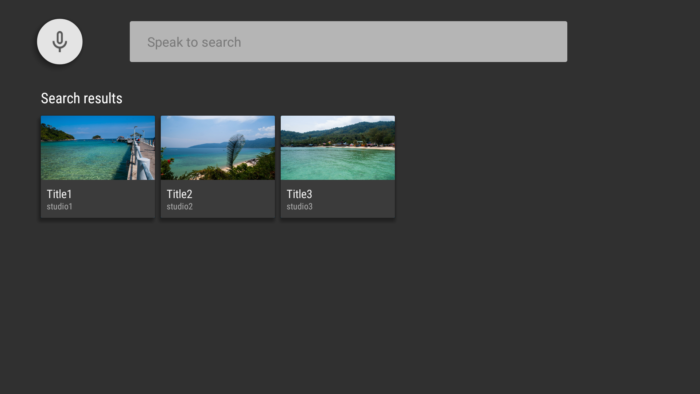
SearchFragment shows the mock search results now.

SearchFragment with Search results.

Source code is on github.

[Update on 1. 8. 2016]: I’m sorry that it seems the implementation is insufficient. We should implement  OnItemViewClickedListener to define the action of clicking these search results.This OnItemViewClickedListener can be set it by 

setOnItemViewClickedListener(new ItemViewClickedListener());

(in this case) in onCreate of BrowseFragment. Please refer Kim Johnsson’s helpful comment below.

Google’s AOSP implementation is explained in the next chapter.

License of the Android Open Source Project

Is the license of the Android Open Source Project Creative Commons Attribution 2.5 or Apache 2.0?

Brief answer

Written in Content License page. AOSP have 2 categories for its licenses. 

Description

I confused when I visit the top page of Android Open Source Project page, since it was written at the bottom that,

Except as noted, this content is licensed under Creative Commons Attribution 2.5

The answer is written in Content License page, which says that

For the purposes of licensing, the content of this web site is divided into two categories:

  • Documentation content, including both static documentation and content extracted from source code modules, as well as sample code, and
  • All other site content

The documentation content on this site is made available to you as part of the Android Open Source Project. This documentation, including any code shown in it, is licensed under the Apache 2.0 license, the preferred license for all parts of the of the Android Open Source Project.

Exact Reproductions

If your online work exactly reproduces text or images from this site, in whole or in part, please include a paragraph at the bottom of your page that reads:

Portions of this page are reproduced from work created and shared by the Android Open Source Project and used according to terms described in the Creative Commons 2.5 Attribution License.

Also, please link back to the original source page so that readers can refer there for more information.

Modified Versions

If your online work shows modified text or images based on the content from this site, please include a paragraph at the bottom of your page that reads:

Portions of this page are modifications based on work created and shared by the Android Open Source Project and used according to terms described in the Creative Commons 2.5 Attribution License.

Ref:

Convert between Bitmap and Drawable

Drawable to Bitmap

It is easy to convert between Drawable and Bitmap in Android.

Bitmap icon = BitmapFactory.decodeResource(context.getResources(),
                                           R.drawable.icon_resource);

Above works for jpg, png type drawables, but it does work for xml type of drawable (I guess because xml file has no specific “width”, “height” information).

In this case, you can use following util method.

public static Bitmap drawableToBitmap (Drawable drawable) {
    Bitmap bitmap = null;

    if (drawable instanceof BitmapDrawable) {
        BitmapDrawable bitmapDrawable = (BitmapDrawable) drawable;
        if(bitmapDrawable.getBitmap() != null) {
            return bitmapDrawable.getBitmap();
        }
    }

    if(drawable.getIntrinsicWidth() <= 0 || drawable.getIntrinsicHeight() <= 0) {
        bitmap = Bitmap.createBitmap(1, 1, Bitmap.Config.ARGB_8888); // Single color bitmap will be created of 1x1 pixel
    } else {
        bitmap = Bitmap.createBitmap(drawable.getIntrinsicWidth(), drawable.getIntrinsicHeight(), Bitmap.Config.ARGB_8888);
    }

    Canvas canvas = new Canvas(bitmap);
    drawable.setBounds(0, 0, canvas.getWidth(), canvas.getHeight());
    drawable.draw(canvas);
    return bitmap;
}

 Above is cited from How to convert a Drawable to a Bitmap? answered by André.

Bitmap to Drawable

Drawable d = new BitmapDrawable(getResources(), bitmap);

Bitmap to Drawable

private static final int IMAGE_WIDTH = 320;
private static final int IMAGE_HEIGHT = 180;

Bitmap scaledBitmap = Bitmap.createScaledBitmap(bitmap, IMAGE_WIDTH, IMAGE_HEIGHT, true);

Drawable that wraps a bitmap and can be tiled, stretched, or aligned. You can create a BitmapDrawable from a file path, an input stream, through XML inflation, or from a Bitmap object.

Reference

Gradle Sync fails in Android studio 1.3

Recently I updated Android studio to version 1.3, and then it fails gradle sync. Error message is something like,

Error:(30, 13) Failed to resolve: com.squareup.picasso:picasso:2.5.2
Show in File
Show in Project Structure dialog

It seems that https proxy server was not working correctly, even if I’m setting proxy server in [File] → [Settings…] → [Appearance & Behavior] → [HTTP Proxy]. 

Solution

 You can set http proxy server & https proxy server manually in gradle.properties file. Add below to your gradle.properties (Project Properties) file.

systemProp.http.proxyHost=xxx.xxx.xxx.xxx
systemProp.http.proxyPort=8080
systemProp.https.proxyHost=xxx.xxx.xxx.xxx
systemProp.https.proxyPort=8080

Replace xxx.xxx.xxx.xxx with IP address of your proxy server & 8080 with your proxy’s port number.

After that, try [Build] → [Clean Project] to re-execute Gradle Sync.

Reference

Recommendation card
– Android TV app Tutorial hands on 11

recommendation

Recommendation

Android TV’s home, LeanbackLauncher has a recommendation row at first row. Any application can suggest recommended contents for users. In this chapter, I will explain how to show recommendation card to LeanbackLauncher from your application.

This recommendation is achieved by using Notification framework whose structure was already existed in Android phone/tablet SDK. So showing recommendation in LeanbackLauncher is actually sending notification. Basic sequence is following 

  1. Declare NotificationManager
  2. Use your customized RecommendationBuilder class (it is custom class which usesNotificationCompat class)  to prepare recommendation.
  3. Make Notification by building RecommendationBuilder
  4. Notify this Notification using NotificationManager.

What is implemented in this chapter?

2 new class, RecommendationBuilder & RecommendationFactory, are implemented in this chapter. RecommendationBuilder is the custom class to create notification for your application. RecommendationFactory actually create notification using RecommendationBuilder.

In this chapter, we will send notification (make recommendation) by clicking the button in MainFragment. It will invoke recommend method in RecommendationFactory to achive recommendation. (As written later, recommendation usually should be done in service. However I implemented recommendation in onClick for easy understanding.) 

RecommendationBuilder

First, RecommendationBuilder is implemented as follows.

package com.corochann.androidtvapptutorial;

import android.app.Notification;
import android.app.PendingIntent;
import android.content.ContentProvider;
import android.content.ContentValues;
import android.content.Context;
import android.database.Cursor;
import android.graphics.Bitmap;
import android.net.Uri;
import android.os.Bundle;
import android.os.ParcelFileDescriptor;
import android.support.v4.app.NotificationCompat;
import android.util.Log;

import java.io.File;
import java.io.FileNotFoundException;
import java.io.FileOutputStream;
import java.io.IOException;

/*
 * This class builds recommendations as notifications with videos as inputs.
 */
public class RecommendationBuilder {

    private static final String TAG = RecommendationBuilder.class.getSimpleName();
    private static final String BACKGROUND_URI_PREFIX = "content://com.corochann.androidtvapptutorial/";

    private Context mContext;

    private int mId;
    private int mPriority;
    private int mFastLaneColor;
    private int mSmallIcon;
    private String mTitle;
    private String mDescription;
    private Bitmap mCardImageBitmap;
    private String mBackgroundUri;
    private Bitmap mBackgroundBitmap;
    private String mGroupKey;
    private String mSort;
    private PendingIntent mIntent;


    public RecommendationBuilder(Context context) {
        mContext = context;
        // default fast lane color
        setFastLaneColor(mContext.getResources().getColor(R.color.fastlane_background));
    }

    public RecommendationBuilder setFastLaneColor(int color) {
        mFastLaneColor = color;
        return this;
    }

    /* context must not be null. It should be specified in constructor */
/*
    public RecommendationBuilder setContext(Context context) {
        mContext = context;
        return this;
    }
*/

    public RecommendationBuilder setId(int id) {
        mId = id;
        return this;
    }

    public RecommendationBuilder setPriority(int priority) {
        mPriority = priority;
        return this;
    }

    public RecommendationBuilder setTitle(String title) {
        mTitle = title;
        return this;
    }

    public RecommendationBuilder setDescription(String description) {
        mDescription = description;
        return this;
    }

    public RecommendationBuilder setBitmap(Bitmap bitmap) {
        mCardImageBitmap = bitmap;
        return this;
    }

    public RecommendationBuilder setBackground(String uri) {
        mBackgroundUri = uri;
        return this;
    }

    public RecommendationBuilder setBackground(Bitmap bitmap) {
        mBackgroundBitmap = bitmap;
        return this;
    }

    public RecommendationBuilder setIntent(PendingIntent intent) {
        mIntent = intent;
        return this;
    }

    public RecommendationBuilder setSmallIcon(int resourceId) {
        mSmallIcon = resourceId;
        return this;
    }

    public Notification build() {

        Bundle extras = new Bundle();
        File bitmapFile = getNotificationBackground(mContext, mId);

        if (mBackgroundBitmap != null) {
            Log.d(TAG, "making URI for mBackgroundBitmap");
            extras.putString(Notification.EXTRA_BACKGROUND_IMAGE_URI,
                    Uri.parse(BACKGROUND_URI_PREFIX + Integer.toString(mId)).toString());
        } else {
            Log.w(TAG, "mBackgroundBitmap is null");
        }

        // the following simulates group assignment into "Top", "Middle", "Bottom"
        // by checking mId and similarly sort order
        mGroupKey = (mId < 3) ? "Group1" : (mId < 5) ? "Group2" : "Group3";
        mSort = (mId < 3) ? "1.0" : (mId < 5) ? "0.7" : "0.3";

        // save bitmap into files for content provider to serve later
        try {
            bitmapFile.createNewFile();
            FileOutputStream fOut = new FileOutputStream(bitmapFile);
            mBackgroundBitmap.compress(Bitmap.CompressFormat.PNG, 85, fOut); //

You can use this RecommendationBuilder class as a library. In that case you don’t need to know the detail of this implementation, so you can skip reading this section. Explanation about this class is written in the remaining of this section.

Most important part is build() function, which shows how to make Notification instance for Android TV recommendation. Recommendation in Android TV  is indeed Notification! It is making a instance of Notification class, by using NotificationCompat.BigPictureStyle method.

    public Notification build() {

        ...

        Notification notification = new NotificationCompat.BigPictureStyle(
                new NotificationCompat.Builder(mContext)
                        .setAutoCancel(true)
                        .setContentTitle(mTitle)
                        .setContentText(mDescription)
                        .setPriority(mPriority)
                        .setLocalOnly(true)
                        .setOngoing(true)
                        .setGroup(mGroupKey)
                        .setSortKey(mSort)
                        .setColor(mContext.getResources().getColor(R.color.fastlane_background))
                        .setCategory(Notification.CATEGORY_RECOMMENDATION)
                        .setLargeIcon(mCardImageBitmap)
                        .setSmallIcon(mSmallIcon)
                        .setContentIntent(mIntent)
                        .setExtras(extras))
                .build();

        Log.d(TAG, "Building notification - " + this.toString());

        return notification;
    }

Many of the function and its related part in the recommendation card is straightforward.

Most tricky part in this function is setting background image. The background image will be displayed when user selects the recommendation card in LeanbackLauncher. This background image is specified by “extra” field, by using Bundle. Key is Notification. EXTRA_BACKGROUND_IMAGE_URI and the value is the URI of backgroundimage. Please note that you can specify bitmap file itself for

  • smallicon – used as application/company logo, shown in the right bottom side of recommendation card.
  • largeicon – used as main image for recommendation card.

But you cannot specify the background image by bitmap. In this implementation, we cache bitmap background image by using content provider and specifying URI of this cached background image.

Storing part is as follows

public Notification build() {

        Bundle extras = new Bundle();
        File bitmapFile = getNotificationBackground(mContext, mId);

        ...

        // save bitmap into files for content provider to serve later
        try {
            bitmapFile.createNewFile();
            FileOutputStream fOut = new FileOutputStream(bitmapFile);
            mBackgroundBitmap.compress(Bitmap.CompressFormat.PNG, 85, fOut); // <- background bitmap must be created by mBackgroundUri, and not  mCardImageBitmap
            fOut.flush();
            fOut.close();
        } catch (IOException ioe) {
            Log.d(TAG, "Exception caught writing bitmap to file!", ioe);
        }

The part of getting background image URI is as follows. When Recommendation card is selected, it will refer extra fields with the key “Notification.EXTRA_BACKGROUND_IMAGE_URI“. The value is sent to Content provider’s openFile method. So the values are handled in the openFile method to extract the file path of already stored background image. 

    public Notification build() {

        Bundle extras = new Bundle();
        File bitmapFile = getNotificationBackground(mContext, mId);

        if (mBackgroundBitmap != null) {
            Log.d(TAG, "making URI for mBackgroundBitmap");
            extras.putString(Notification.EXTRA_BACKGROUND_IMAGE_URI,
                    Uri.parse(BACKGROUND_URI_PREFIX + Integer.toString(mId)).toString());
        } else {
            Log.w(TAG, "mBackgroundBitmap is null");
        }

    ...

    }

    public static class RecommendationBackgroundContentProvider extends ContentProvider {

        ...

        @Override
        /*
         * content provider serving files that are saved locally when recommendations are built
         */
        public ParcelFileDescriptor openFile(Uri uri, String mode) throws FileNotFoundException {
            Log.i(TAG, "openFile");
            int backgroundId = Integer.parseInt(uri.getLastPathSegment());
            File bitmapFile = getNotificationBackground(getContext(), backgroundId);
            return ParcelFileDescriptor.open(bitmapFile, ParcelFileDescriptor.MODE_READ_ONLY);
        }
    }

RecommendationFactory

RecommendationFactory class uses the RecommendationBuilder to create notification for recommending Movie items. Implementation is following.

package com.corochann.androidtvapptutorial;

import android.app.Activity;
import android.app.Notification;
import android.app.NotificationManager;
import android.app.PendingIntent;
import android.app.TaskStackBuilder;
import android.content.Context;
import android.content.Intent;
import android.graphics.Bitmap;
import android.support.v4.app.NotificationCompat;
import android.util.Log;

import com.squareup.picasso.Picasso;

import java.net.URI;

public class RecommendationFactory {

    private static final String TAG = RecommendationFactory.class.getSimpleName();
    private static final int CARD_WIDTH = 500;
    private static final int CARD_HEIGHT = 500;
    private static final int BACKGROUND_WIDTH = 1920;
    private static final int BACKGROUND_HEIGHT = 1080;

    private Context mContext;
    private NotificationManager mNotificationManager;

    public RecommendationFactory(Context context) {
        mContext = context;
        if (mNotificationManager == null) {
            mNotificationManager = (NotificationManager) mContext.getSystemService(Context.NOTIFICATION_SERVICE);
        }
    }


    public void recommend(int id, Movie movie) {
        recommend(id, movie, NotificationCompat.PRIORITY_DEFAULT);
    }

    /**
     * create a notification for recommending item of Movie class
     * @param movie
     */
    public void recommend(final int id, final Movie movie, final int priority) {
        Log.i(TAG, "recommend");
        /* Run in background thread, since bitmap loading must be done in background */
        new Thread(new Runnable() {
            @Override
            public void run() {
                Log.i(TAG, "recommendation in progress");
                Bitmap backgroundBitmap = prepareBitmap(movie.getCardImageUrl(), BACKGROUND_WIDTH, BACKGROUND_HEIGHT);
                Bitmap cardImageBitmap = prepareBitmap(movie.getCardImageUrl(), CARD_WIDTH, CARD_HEIGHT);
                PendingIntent intent = buildPendingIntent(movie, id);

                RecommendationBuilder recommendationBuilder = new RecommendationBuilder(mContext)
                        .setSmallIcon(R.mipmap.ic_launcher)
                        .setBackground(backgroundBitmap)
                        .setId(id)
                        .setPriority(priority)
                        .setTitle(movie.getTitle())
                        .setDescription(movie.getDescription())
                        .setIntent(intent)
                        .setBitmap(cardImageBitmap)
                        .setFastLaneColor(mContext.getResources().getColor(R.color.fastlane_background));
                Notification recommendNotification = recommendationBuilder.build();
                mNotificationManager.notify(id, recommendNotification);
            }}).start();
    }

    /**
     * prepare bitmap from URL string
     * @param url
     * @return
     */
    public Bitmap prepareBitmap(String url, int width, int height) {
        Bitmap bitmap = null;
        try {
            URI uri = new URI(url);
            bitmap = Picasso.with(mContext)
                    .load(uri.toString())
                    .resize(width, height)
                    .get();
        } catch (Exception e) {
            Log.e(TAG, e.toString());
        }
        return bitmap;
    }

    private PendingIntent buildPendingIntent(Movie movie, int id) {
        Intent detailsIntent = new Intent(mContext, DetailsActivity.class);
        detailsIntent.putExtra(DetailsActivity.MOVIE, movie);
        detailsIntent.putExtra(DetailsActivity.NOTIFICATION_ID, id);

        TaskStackBuilder stackBuilder = TaskStackBuilder.create(mContext);
        stackBuilder.addParentStack(DetailsActivity.class);
        stackBuilder.addNextIntent(detailsIntent);
        // Ensure a unique PendingIntents, otherwise all recommendations end up with the same
        // PendingIntent
        detailsIntent.setAction(Long.toString(movie.getId()));

        return stackBuilder.getPendingIntent(0, PendingIntent.FLAG_UPDATE_CURRENT);
    }
}

recommend method is the main method, which makes the recommend Notification. Procedure is following

  1. Declare NotificationManager
    It is done in the Constructor of RecommendationFactory class.
    public RecommendationFactory(Context context) {
        mContext = context;
        if (mNotificationManager == null) {
            mNotificationManager = (NotificationManager) mContext.getSystemService(Context.NOTIFICATION_SERVICE);
        }
    }
  1. Use your customized RecommendationBuilder class (it is custom class which usesNotificationCompat class)  to prepare recommendation.
    Brief explanation of each set function
    • Id – ID for this recommendation card.
    • Priority – set priority. high priority card is more likely to be shown in the recommendation row in LeanbackLauncher.
    • Background – set background bitmap, which will be shown when user select recommendation card.
    • Title – first row text of recommendation card.
    • Description – second row text of recommendation card.
    • Bitmap – main image of recommendation card.
    • SmallIcon – company/image icon.
    • FastLaneColor – set background color of text field in the recommendation card
    • Intent – set PendingIntent (action) to indicate that what will happen after user click this recommendation card. buildPendingIntent method is used to create intent in this example.
  2. Make Notification by building RecommendationBuilder
  3. Notify this Notification using NotificationManager.
    These are done in recommend method.
    public void recommend(final int id, final Movie movie, final int priority) {
        Log.i(TAG, "recommend");
        /* Run in background thread, since bitmap loading must be done in background */
        new Thread(new Runnable() {
            @Override
            public void run() {
                Log.i(TAG, "recommendation in progress");
                Bitmap backgroundBitmap = prepareBitmap(movie.getCardImageUrl(), BACKGROUND_WIDTH, BACKGROUND_HEIGHT);
                Bitmap cardImageBitmap = prepareBitmap(movie.getCardImageUrl(), CARD_WIDTH, CARD_HEIGHT);
                PendingIntent intent = buildPendingIntent(movie, id);
                // 2 prepare recommendation
                RecommendationBuilder recommendationBuilder = new RecommendationBuilder(mContext)
                        .setSmallIcon(R.mipmap.ic_launcher)
                        .setBackground(backgroundBitmap)
                        .setId(id)
                        .setPriority(priority)
                        .setTitle(movie.getTitle())
                        .setDescription(movie.getDescription())
                        .setIntent(intent)
                        .setBitmap(cardImageBitmap)
                        .setFastLaneColor(mContext.getResources().getColor(R.color.fastlane_background));
                // 3 make notification
                Notification recommendNotification = recommendationBuilder.build();
                // 4 norify
                mNotificationManager.notify(id, recommendNotification);
            }}).start();
    }

That’s all. It is easy.

Build & run

recommendation
Recommendation card on LeanbackLauncher

You can send recommendation card by clicking “recommendation” button.

Source code is on github.

Running recommendation as service

Recommendation is a concept that application suggests user to navigate next action. So most of the time, recommendation may be done in the background. I will follow up about this in the remainder.

Official doc Recommending TV Content – Android developers explains how to do recommendation in the background service, and Google’s sample code is showing real source code implementation of usage of background service. In this sample source code, recommendation service will be launched after getting the intent of “BOOT_COMPLETED”, and it will execute recommendation in background every 30 min.

Install CPU-Z on Android TV

Now Android TV is working on Android platform. Some may be interested in CPU, memory, harddisk information about your TV. We can check these CPU, memory, sensor information.. with Android application app, e.g. “CPU-Z”.

Again, I tested installing CPU-Z app for Android phone app by using this Technique.

I test with SONY BRAVIA 2015 model Android TV, “KDL-43W800C“.

CPU information

Kernel Version, Memory (RAM), Internal Storage (HDD info) are available.

* This post is workaround for testing Android TV. It does not mean that this post guarantee the behavior of introduced apps on Android TV. The tips written here is not officially supported, and I don’t take any responsibility caused by using this Technique. Try it with your own responsibility.

GuidedStepFragment
– Android TV app hands on tutorial 10

FirstStepFragment1

GuidedStepFragment to show Settings display

Leanback support library offers a Fragment. Especially, it is useful to use in settings display. Official doc says,

A GuidedStepFragment is used to guide the user through a decision or series of decisions. 

I also recommend you to read these references for this topic.

Create GuidedStepActivity & Implement onItemClicked in MainFragment

At first, create GuidedStepActivity by right click your package name New → Java Class → type “GuidedStepActivity” in class name. Note that this GuidedStepActivity doesn’t require res/layout xml file, so it is ok to only create Java class. Make this class subclass of Activity (write ” extends Activity” in class declaration).

Then, let’s make a button to launch this GuidedStepActivity.

    private final class ItemViewClickedListener implements OnItemViewClickedListener {
        @Override
        public void onItemClicked(Presenter.ViewHolder itemViewHolder, Object item,
                                  RowPresenter.ViewHolder rowViewHolder, Row row) {
            // each time the item is clicked, code inside here will be executed.
            if (item instanceof Movie) {
                Movie movie = (Movie) item;
                Log.d(TAG, "Item: " + item.toString());
                Intent intent = new Intent(getActivity(), DetailsActivity.class);
                intent.putExtra(DetailsActivity.MOVIE, movie);

                getActivity().startActivity(intent);
            } else if (item instanceof String){
                if (item == "ErrorFragment") {
                    Intent intent = new Intent(getActivity(), ErrorActivity.class);
                    startActivity(intent);
                } else if (item == "GuidedStepFragment") {
                    Intent intent = new Intent(getActivity(), GuidedStepActivity.class);
                    startActivity(intent);
                }
            }
        }

    private void loadRows() {
        mRowsAdapter = new ArrayObjectAdapter(new ListRowPresenter());

        /* GridItemPresenter */
        HeaderItem gridItemPresenterHeader = new HeaderItem(0, "GridItemPresenter");

        GridItemPresenter mGridPresenter = new GridItemPresenter();
        ArrayObjectAdapter gridRowAdapter = new ArrayObjectAdapter(mGridPresenter);
        gridRowAdapter.add("ErrorFragment");
        gridRowAdapter.add("GuidedStepFragment");
        gridRowAdapter.add("ITEM 3");
        mRowsAdapter.add(new ListRow(gridItemPresenterHeader, gridRowAdapter));

        ...
    }

Add declaration of this Activity to AndroidManifest.

        <activity android:name="GuidedStepActivity"
            android:theme="@style/Theme.Example.Leanback.GuidedStep"/>

So we can start implementing GuidedStepFragment from here. Before real implementation, I will explain a basic structure of this GuidedStepFragment.

GuidedStepFragment – Structure

As mentioned in official doc, It is composed of a guidance view on the left and a view on the right containing a list of possible actions.

GuidedStepFragment
GuidedStepFragment is composed of Guidance View on the left and Actions view on the right.

Overriding Method

To use GuidedStepFragment, we need to override at least these 3 methods.

  • onCreateGuidance(Bundle)
    – To create guidance view (left side). 
    – Attributes of guidance (title, description etc) are specified here. 
  • onCreateActions(List, Bundle)
    – To define list of possible actions (right side).
    – Attributes of action are specified here.
  • onGuidedActionClicked(GuidedAction)
    – This is onClick listener.
    – Behaviors after clicking action buttons can be specified here.

At least if you know this, you can use GuidedStepFragment. But you may want to modify the design layout of this Guidance. You can use “Theme” & “Stylist” to customize visual styling

Theme

GuidedStepFragment must receive Theme_Leanback_GuidedStep. We can set themes in one of three ways,

1. Set the theme for the host Activity to the GuidedStep theme.

2. The existing Activity theme can have an entry added for the attribute LeanbackGuidedStepTheme_guidedStepTheme.

3. Custom subclasses of GuidedStepFragment may provide a theme through the onProvideTheme() method.

Stylists

You can also use “Stylists” (instead of Presenter which we are using so far to customize visual styling. There are 2 Stylist class.

  • GuidanceStylist          : left guidance view
    – onCreateGuidanceStylist()
  • GuidedActionsStylist : right actions view
    – onCreateActionsStylist()

GuidedStepFragment – Minimum Implementation (Overriding method)

To attach instance of GuidedStepFragment, we can use GuidedStepFragment.add function. Here instance of FirstStepFragment class, which is a subclass of GuidedStepFragment, is added at onCreate of GuidedStepActivity.

Please also check the sample implementation of 3 overriding methods such as, onCreateGuidanceonCreateActions and onGuidedActionClicked.

package com.corochann.androidtvapptutorial;

import android.app.Activity;
import android.app.FragmentManager;
import android.graphics.drawable.Drawable;
import android.os.Bundle;
import android.support.annotation.NonNull;
import android.support.v17.leanback.app.GuidedStepFragment;
import android.support.v17.leanback.widget.GuidanceStylist;
import android.support.v17.leanback.widget.GuidedAction;
import android.util.Log;

import java.util.List;

/**
 * Created by corochann on 24/7/2015.
 */
public class GuidedStepActivity extends Activity {

    private static final String TAG = GuidedStepActivity.class.getSimpleName();

    /* Action ID definition */
    private static final int ACTION_CONTINUE = 0;
    private static final int ACTION_BACK = 1;

    @Override
    protected void onCreate(Bundle savedInstanceState) {
        Log.d(TAG, "onCreate");
        super.onCreate(savedInstanceState);
        if (null == savedInstanceState) {
            GuidedStepFragment.add(getFragmentManager(), new FirstStepFragment());
        }
    }

    private static void addAction(List actions, long id, String title, String desc) {
        actions.add(new GuidedAction.Builder()
                .id(id)
                .title(title)
                .description(desc)
                .build());
    }

    public static class FirstStepFragment extends GuidedStepFragment {
        @NonNull
        @Override
        public GuidanceStylist.Guidance onCreateGuidance(Bundle savedInstanceState) {
            String title = "Title";
            String breadcrumb = "Breadcrumb";
            String description = "Description";
            Drawable icon = getActivity().getDrawable(R.drawable.ic_main_icon);

            return new GuidanceStylist.Guidance(title, description, breadcrumb, icon);
        }

        @Override
        public void onCreateActions(@NonNull List actions, Bundle savedInstanceState) {
            addAction(actions, ACTION_CONTINUE, "Continue", "Go to SecondStepFragment");
            addAction(actions, ACTION_BACK, "Cancel", "Go back");
        }

        @Override
        public void onGuidedActionClicked(GuidedAction action) {

            switch ((int) action.getId()){
                case ACTION_CONTINUE:
                    // FragmentManager fm = getFragmentManager();
                    // GuidedStepFragment.add(fm, new SecondStepFragment());
                    break;
                case ACTION_BACK:
                    getActivity().finish();
                    break;
                default:
                    Log.w(TAG, "Action is not defined");
                    break;
            }
        }
    }
}

Build and run 1

Guidance should be looks like this.

FirstStepFragment1


Source code is on github.

GuidedStepFragment – Theme

I copied res/values/themes.xml from Google sample source code. Then, you can onProvideTheme method to specify customized Theme.

In the AndroidManifest file, specify theme.

        <activity android:name="GuidedStepActivity"
            android:theme="@style/Theme.Example.Leanback.GuidedStep"/>

Which is defined in themes.xml file.

    <style name="Theme.Example.Leanback.GuidedStep" parent="Theme.Leanback.GuidedStep">
        <item name="guidanceIconStyle">@style/Widget.Example.Leanback.GuidanceIconStyle</item>
    </style>

According to official doc

GuidedStepFragments must have access to an appropriate theme in order for the stylists to function properly. Specifically, the fragment must receive Theme_Leanback_GuidedStep, or a theme whose parent is set to that theme.

Another way to specify theme is to override GuidedStepFragment.onProvideTheme method.

    public static class FirstStepFragment extends GuidedStepFragment {
        @Override
        public int onProvideTheme() {
            return R.style.Theme_Example_Leanback_GuidedStep_First;
        }

That’s all for implementation of FirstStepFragment, let’s proceed to implment SecondStepFragment. 

SecondStepFragment

At first let’s implement 3 override methods, onCreateGuidanceonCreateActions and onGuidedActionClicked.

    /* Action set ID */
    private static final int OPTION_CHECK_SET_ID = 10;

    /* Options of SecondStepFragment */
    private static final String[] OPTION_NAMES = {"Option A", "Option B", "Option C"};
    private static final String[] OPTION_DESCRIPTIONS = {"Here's one thing you can do",
            "Here's another thing you can do", "Here's one more thing you can do"};
    private static final int[] OPTION_DRAWABLES = {R.drawable.ic_guidedstep_option_a,
            R.drawable.ic_guidedstep_option_b, R.drawable.ic_guidedstep_option_c};
    private static final boolean[] OPTION_CHECKED = {true, false, false};

    ...

    public static class SecondStepFragment extends GuidedStepFragment {
        @NonNull
        @Override
        public GuidanceStylist.Guidance onCreateGuidance(Bundle savedInstanceState) {
            String title = "SecondStepFragment";
            String breadcrumb = "Guided Steps: 2";
            String description ="Showcasing different action configurations";
            Drawable icon = getActivity().getDrawable(R.drawable.ic_main_icon);
            return new GuidanceStylist.Guidance(title, description, breadcrumb, icon);
        }

        @Override
        public void onCreateActions(List<GuidedAction> actions, Bundle savedInstanceState) {
            String title = "infoOnly action";
            String desc = "infoOnly indicates whether this action is for information purposes only and cannot be clicked.\n" +
                    "The description can be long, by set multilineDescription to true";

            actions.add(new GuidedAction.Builder()
                    .title(title)
                    .description(desc)
                    .multilineDescription(true)
                    .infoOnly(true)
                    .enabled(false)
                    .build());
            for (int i = 0; i < OPTION_NAMES.length; i++) {
                addCheckedAction(actions,
                        OPTION_DRAWABLES[i],
                        getActivity(),
                        OPTION_NAMES[i],
                        OPTION_DESCRIPTIONS[i],
                        OPTION_CHECKED[i]);
            }
        }

        @Override
        public void onGuidedActionClicked(GuidedAction action) {
            String text = OPTION_NAMES[getSelectedActionPosition() - 1] + " clicked";
            Toast.makeText(getActivity(), text, Toast.LENGTH_SHORT).show();
        }
    }

Radio-button type Action

addCheckedAction method in onCreateActions will make radio button type action list.

    private static void addCheckedAction(List<GuidedAction> actions, int iconResId, Context context,
                                         String title, String desc, boolean checked) {
        GuidedAction guidedAction = new GuidedAction.Builder()
                .title(title)
                .description(desc)
                .checkSetId(OPTION_CHECK_SET_ID)
                .iconResourceId(iconResId, context)
                .build();
        guidedAction.setChecked(checked);
        actions.add(guidedAction);
    }

checkSetId method is the key to achieve this. When you specify actions with same setId, you can select only one of this action.

GuidedStepFragment – Stylist

Finally, customize stylist. To customize left side guidance view, call onCreateGuidanceStylist.

    public static class SecondStepFragment extends GuidedStepFragment {

        ...

        @Override
        public GuidanceStylist onCreateGuidanceStylist() {
            return new GuidanceStylist() {
                @Override
                public int onProvideLayoutId() {
                    return R.layout.guidedstep_second_guidance;
                }
            };
        }
    }

Sample layout file looks like this, so you can specify layout of the guidance view inside this layout file.

<?xml version="1.0" encoding="utf-8"?>
<FrameLayout xmlns:android="http://schemas.android.com/apk/res/android"
    xmlns:tools="http://schemas.android.com/tools"
    android:layout_width="match_parent"
    android:layout_height="match_parent" >

    <RelativeLayout
        android:layout_width="match_parent"
        android:layout_height="match_parent"
        style="?attr/guidanceContainerStyle"
        android:id="@+id/relative_layout">

        <ImageView
            android:id="@+id/guidance_icon"
            style="@style/Widget.Example.Leanback.SecondStepGuidanceIconStyle"
            android:layout_width="188dp"
            tools:ignore="ContentDescription" />

        <TextView
            android:id="@+id/guidance_title"
            android:textColor="@color/guidance_title"
            android:layout_marginLeft="50dp"
            android:layout_marginRight="50dp"
            style="?attr/guidanceTitleStyle"
            android:layout_width="match_parent"
            android:layout_height="wrap_content" />

        <TextView
            android:id="@+id/guidance_breadcrumb"
            android:textColor="@color/guidance_breadcrumb"
            android:textAlignment="center"
            android:gravity="center"
            style="?attr/guidanceBreadcrumbStyle"
            android:layout_width="match_parent"
            android:layout_height="wrap_content" />

        <TextView
            android:id="@+id/guidance_description"
            android:textColor="@color/guidance_description"
            style="?attr/guidanceDescriptionStyle"
            android:layout_width="match_parent"
            android:layout_height="wrap_content" />

    </RelativeLayout>

</FrameLayout>

Build and run 2

Now customized layout guidance view with radio button type actions are implemented.

SecondStepFragment

Source code is on github.

Install Spotify on Android TV

spotify

Install Spotify Android phone app on Android TV

At the time of writing, official spotify app for Android TV is not released yet.

But I tested installing Spotify app for Android phone app by using this Technique.

As a result, I could stream music without any big problem. At the first time of launching app, you need to log in. You may need to use USB mouse & USB keyboard because remote controller is not enough to press some button sometimes.

spotify
Spotify app for Android phone is installed on Android TV.

Also, Now playing card will appear when you go back to Leanback Launcher display. Further more, you can use skipToNext & skipToPrevious Media button at Leanback Launcher display!!

Now playing card will properly appears. Also Previous & Next button works from remote controller.

What is nice if you stream music from TV rather than smartphones?

Of course, sound is much bigger & you can enjoy music with family or friends! If your TV is connected with Home theater system, 5.1 ch sound system… you can also enjoy music in Spotify with DYNAMIC sound, which is awesome 🙂

* This post is workaround for testing Android TV. It does not mean that this post guarantee the behavior of introduced apps on Android TV. The tips written here is not officially supported, and I don’t take any responsibility caused by this Technique. Try it with your own responsibility.

Unofficial apps for Spotify are already available

Actually, you can already find Unofficial spotify apps for Android TV in Google play store. For example, I found “TV Player for Spotify”.

It is quite easy to use, and design is optimized for Android TV usage.

TV_Player_For_Spotify
TV Player for Spotify app

 There is Google plus community for this app.

Can we control background video playback on Leanback Launcher by remote controller?

I’m testing Google’s sample app https://github.com/googlesamples/androidtv-Leanback. After start playing video and go back to Leanback Launcher home display, it keeps playing in background with now playing card. 
I found pause key stops background video and changes back to normal background, and only after that MediaSession callback is working.
After background changes to normal Leanback Launcher background paper, play/pause button changes the video status of now playing card, However background is not video but normal display… Is there a way to show video in background with this condition?

See below video for the behavior I’m writing about.
When background video playback changes to normal background, I’m pressing pause button on Leanback Launcher display. After that, I’m pressing play button of remote controller to play/pause, which only working in now playing card, but background is not video.