[Update 2015.11.18]: Revise.
Aim of this chapter
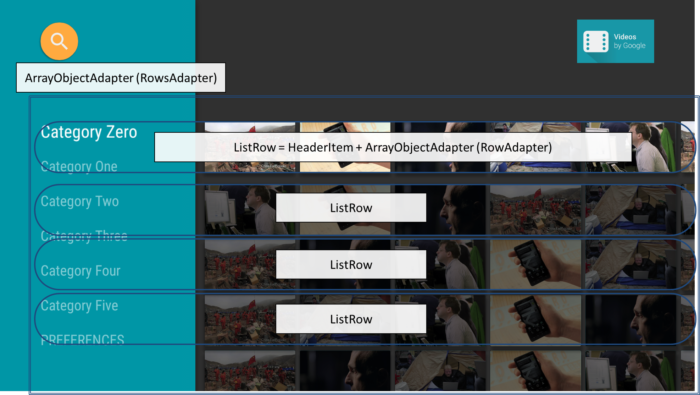
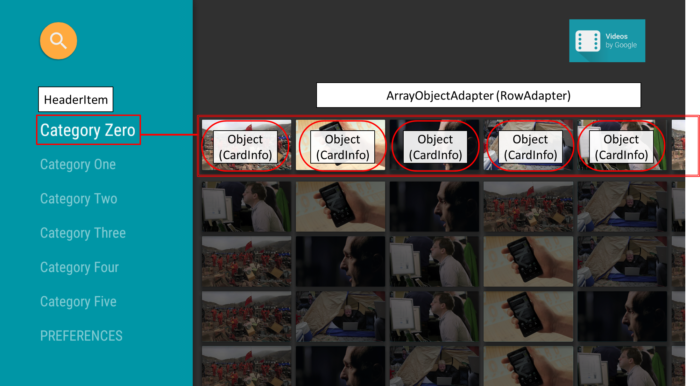
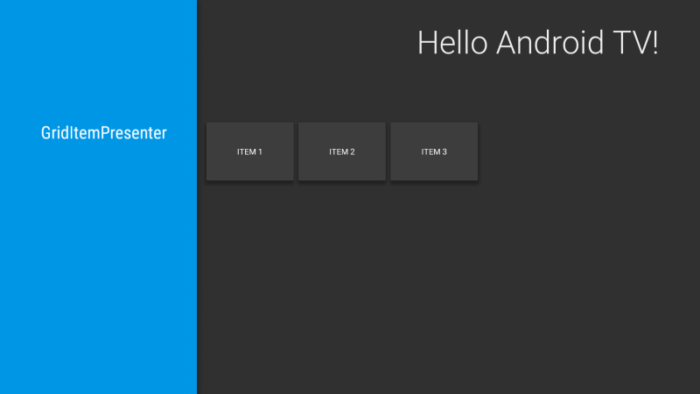
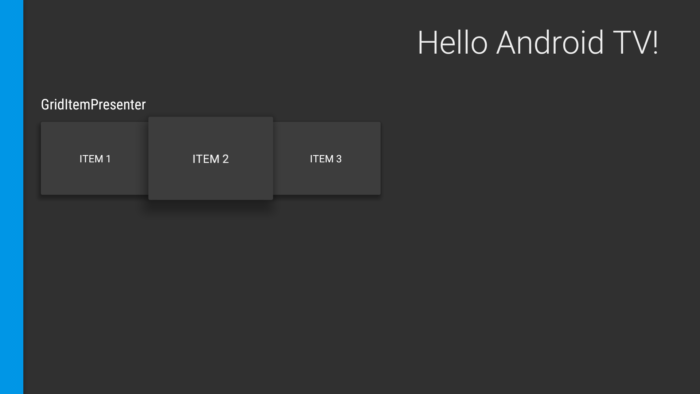
In previous chapter, we looked GridItemPresenter. Its relationship was following.
- Presenter:
GridItemPresenter - ViewHolder’s view:
TextView - CardInfo/Item:
String
This was easy example. In this chapter, we proceed to introduce another type of Presenter,
- Presenter:
CardPresenter - ViewHolder’s view:
ImageCardView - CardInfo/Item:
Movieclass
ImageCardView
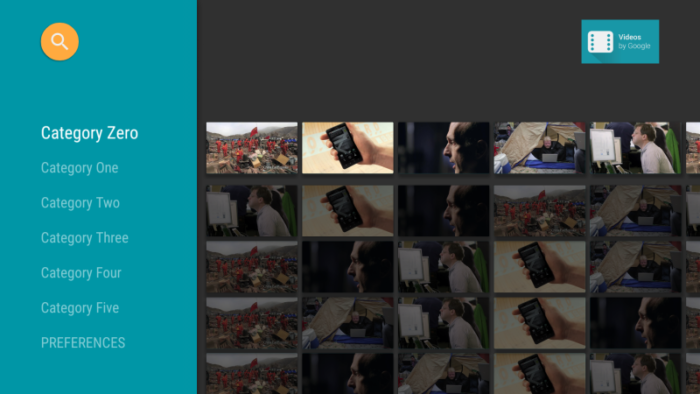
ImageCardView class is provided from Android SDK, and it provides a card design layout with main image, title text and content text.
ImageCardView is a subclass of BaseCardView, so it is nice to look BaseCardView class. This is the explanation of BaseCardView,
android.support.v17.leanback.widget
public class BaseCardView
extends android.widget.FrameLayout
A card style layout that responds to certain state changes. It arranges its children in a vertical column, with different regions becoming visible at different times.
A BaseCardView will draw its children based on its type, the region visibilities of the child types, and the state of the widget. A child may be marked as belonging to one of three regions: main, info, or extra. The main region is always visible, while the info and extra regions can be set to display based on the activated or selected state of the View. The card states are set by calling setActivated and setSelected.
BaseCardView itself does not provide specific design layout. So when you want to utilize this, you can make subclass of BaseCardView which have specific design. ImageCardView is one of the class, and currently I could find only ImageCardView class as the subclass of BaseCardView provided by SDK.
In this chapter, we will add this ImageCardView to our code.
Implement CardPresenter, Movie class
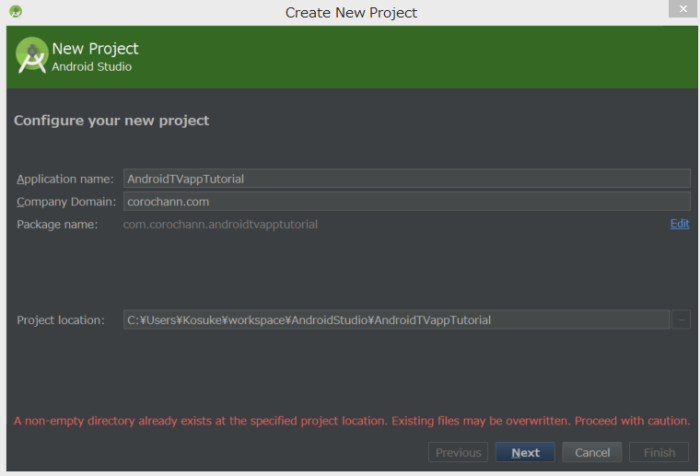
I will start by placing necessary files at first. Rightclick on package,
- New → class → CardPresenter
- New → class → Movie
- For the main image, we use movie.png.
Copy res/drawable/movie.png from Android TV sample application. - We will use Utility functions provided by Android TV sample application.
Copy [package name]/Utils class from Android TV sample application to your source code.
First, Utils.java is just copying from AOSP, which will be below.
/*
 * Copyright (C) 2014 The Android Open Source Project
 *
 * Licensed under the Apache License, Version 2.0 (the "License"); you may not use this file except
 * in compliance with the License. You may obtain a copy of the License at
 *
 * http://www.apache.org/licenses/LICENSE-2.0
 *
 * Unless required by applicable law or agreed to in writing, software distributed under the License
 * is distributed on an "AS IS" BASIS, WITHOUT WARRANTIES OR CONDITIONS OF ANY KIND, either express
 * or implied. See the License for the specific language governing permissions and limitations under
 * the License.
 */

package com.corochann.androidtvapptutorial;

import android.content.Context;
import android.graphics.Point;
import android.view.Display;
import android.view.WindowManager;
import android.widget.Toast;

/**
 * A collection of utility methods, all static.
 */
public class Utils {

    /*
     * Making sure public utility methods remain static
     */
    private Utils() {
    }

    /**
     * Returns the screen/display size
     */
    public static Point getDisplaySize(Context context) {
        WindowManager wm = (WindowManager) context.getSystemService(Context.WINDOW_SERVICE);
        Display display = wm.getDefaultDisplay();
        Point size = new Point();
        display.getSize(size);
        return size;
    }

    /**
     * Shows a (long) toast
     */
    public static void showToast(Context context, String msg) {
        Toast.makeText(context, msg, Toast.LENGTH_LONG).show();
    }

    /**
     * Shows a (long) toast.
     */
    public static void showToast(Context context, int resourceId) {
        Toast.makeText(context, context.getString(resourceId), Toast.LENGTH_LONG).show();
    }

    public static int convertDpToPixel(Context ctx, int dp) {
        float density = ctx.getResources().getDisplayMetrics().density;
        return Math.round((float) dp * density);
    }

    /**
     * Formats time in milliseconds to hh:mm:ss string format.
     */
    public static String formatMillis(int millis) {
        String result = "";
        int hr = millis / 3600000;
        millis %= 3600000;
        int min = millis / 60000;
        millis %= 60000;
        int sec = millis / 1000;
        if (hr > 0) {
            result += hr + ":";
        }
        if (min >= 0) {
            if (min > 9) {
                result += min + ":";
            } else {
                result += "0" + min + ":";
            }
        }
        if (sec > 9) {
            result += sec;
        } else {
            result += "0" + sec;
        }
        return result;
    }
}
Second, Movie class defines the CardInfo/Item which CardPresenter will present using ImageCardView. It should have the imformation of
- main image
- title text
- content text (studio)
But for the first stage, I only put the information of “title” and “content (studio)”.
/*
 * Copyright (C) 2014 The Android Open Source Project
 *
 * Licensed under the Apache License, Version 2.0 (the "License"); you may not use this file except
 * in compliance with the License. You may obtain a copy of the License at
 *
 * http://www.apache.org/licenses/LICENSE-2.0
 *
 * Unless required by applicable law or agreed to in writing, software distributed under the License
 * is distributed on an "AS IS" BASIS, WITHOUT WARRANTIES OR CONDITIONS OF ANY KIND, either express
 * or implied. See the License for the specific language governing permissions and limitations under
 * the License.
 */

package com.corochann.androidtvapptutorial;

import android.util.Log;

import java.net.URI;
import java.net.URISyntaxException;

/**
 *  Modified from AOSP sample source code, by corochann on 2/7/2015.
 *  Movie class represents video entity with title, description, image thumbs and video url.
 */
public class Movie {

    private static final String TAG = Movie.class.getSimpleName();

    static final long serialVersionUID = 727566175075960653L;
    private long id;
    private String title;
    private String studio;

    public Movie() {
    }

    public long getId() {
        return id;
    }

    public void setId(long id) {
        this.id = id;
    }

    public String getTitle() {
        return title;
    }

    public void setTitle(String title) {
        this.title = title;
    }

    public String getStudio() {
        return studio;
    }

    public void setStudio(String studio) {
        this.studio = studio;
    }

    @Override
    public String toString() {
        return "Movie{" +
                "id=" + id +
                ", title='" + title + '\'' +
                '}';
    }
}
Last implementaiton is CardPresenter, it is a subclass of Presenter. CardPresenter owns ViewHolder extended from parent’s Presenter.ViewHolder. This ViewHolder holds ImageCardView which is used to present UI for the Movie item.
/*
* Copyright (C) 2014 The Android Open Source Project
*
* Licensed under the Apache License, Version 2.0 (the "License"); you may not use this file except
* in compliance with the License. You may obtain a copy of the License at
*
* http://www.apache.org/licenses/LICENSE-2.0
*
* Unless required by applicable law or agreed to in writing, software distributed under the License
* is distributed on an "AS IS" BASIS, WITHOUT WARRANTIES OR CONDITIONS OF ANY KIND, either express
* or implied. See the License for the specific language governing permissions and limitations under
* the License.
*/
package com.corochann.androidtvapptutorial;
import android.content.Context;
import android.graphics.Bitmap;
import android.graphics.drawable.BitmapDrawable;
import android.graphics.drawable.Drawable;
import android.support.v17.leanback.widget.ImageCardView;
import android.support.v17.leanback.widget.Presenter;
import android.util.Log;
import android.view.View;
import android.view.ViewGroup;
/**
* Modified from AOSP sample source code, by corochann on 2/7/2015.
*/
public class CardPresenter extends Presenter {
private static final String TAG = CardPresenter.class.getSimpleName();
private static Context mContext;
private static int CARD_WIDTH = 313;
private static int CARD_HEIGHT = 176;
static class ViewHolder extends Presenter.ViewHolder {
private Movie mMovie;
private ImageCardView mCardView;
private Drawable mDefaultCardImage;
public ViewHolder(View view) {
super(view);
mCardView = (ImageCardView) view;
mDefaultCardImage = mContext.getResources().getDrawable(R.drawable.movie);
}
public void setMovie(Movie m) {
mMovie = m;
}
public Movie getMovie() {
return mMovie;
}
public ImageCardView getCardView() {
return mCardView;
}
public Drawable getDefaultCardImage() {
return mDefaultCardImage;
}
}
@Override
public ViewHolder onCreateViewHolder(ViewGroup parent) {
Log.d(TAG, "onCreateViewHolder");
mContext = parent.getContext();
ImageCardView cardView = new ImageCardView(mContext);
cardView.setFocusable(true);
cardView.setFocusableInTouchMode(true);
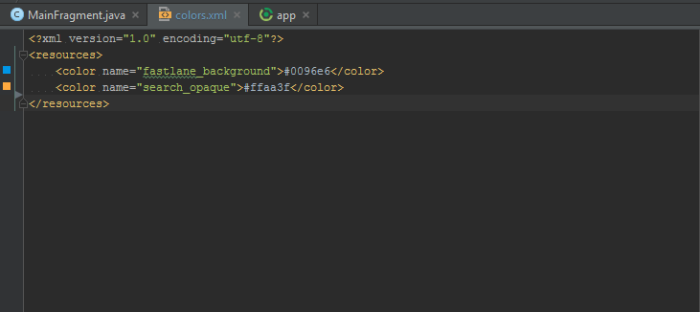
cardView.setBackgroundColor(mContext.getResources().getColor(R.color.fastlane_background));
return new ViewHolder(cardView);
}
@Override
public void onBindViewHolder(Presenter.ViewHolder viewHolder, Object item) {
Movie movie = (Movie) item;
((ViewHolder) viewHolder).setMovie(movie);
Log.d(TAG, "onBindViewHolder");
((ViewHolder) viewHolder).mCardView.setTitleText(movie.getTitle());
((ViewHolder) viewHolder).mCardView.setContentText(movie.getStudio());
((ViewHolder) viewHolder).mCardView.setMainImageDimensions(CARD_WIDTH, CARD_HEIGHT);
((ViewHolder) viewHolder).mCardView.setMainImage(((ViewHolder) viewHolder).getDefaultCardImage());
}
@Override
public void onUnbindViewHolder(Presenter.ViewHolder viewHolder) {
Log.d(TAG, "onUnbindViewHolder");
}
@Override
public void onViewAttachedToWindow(Presenter.ViewHolder viewHolder) {
// TO DO
}
}
Preparation of data model = Movie and presenter = CardPresenter are done. We can show Movie item by putting the item to adapter.
private void loadRows() {
        mRowsAdapter = new ArrayObjectAdapter(new ListRowPresenter());
        ...

        /* CardPresenter */
        HeaderItem cardPresenterHeader = new HeaderItem(1, "CardPresenter");
        CardPresenter cardPresenter = new CardPresenter();
        ArrayObjectAdapter cardRowAdapter = new ArrayObjectAdapter(cardPresenter);

        for(int i=0; i<10; i++) {
            Movie movie = new Movie();
            movie.setTitle("title" + i);
            movie.setStudio("studio" + i);
            cardRowAdapter.add(movie);
        }
        mRowsAdapter.add(new ListRow(cardPresenterHeader, cardRowAdapter));

         ...
    }
Build and Run 1
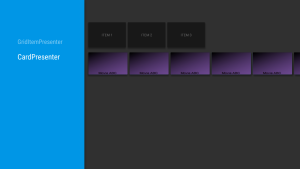
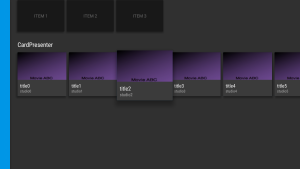
CardPresenter header will appear in the second line, and ImageCardView shows the default card image. The title and content text will appear when you move from header to contents (when items are “onActivated”).
Source code is on github.
Updating main image after downloading picture from web using Picasso
Above example shows the default image in the ImageCardView which must be included together with your app (image is static). Sometimes, however, you want to use the image downloading from web so that your application can show updated information.
Picasso image loader library will help us to achieve this easily. Here are the references.
In the CardPresenter class, we want to use picasso library, which can be included by adding a following line in app/build.gradle file.
dependencies {
    compile fileTree(dir: 'libs', include: ['*.jar'])
    compile 'com.android.support:recyclerview-v7:22.2.0'
    compile 'com.android.support:leanback-v17:22.2.0'
    compile 'com.squareup.picasso:picasso:2.3.2'
}
We will add cardImageUrl member to Movie class, which points a URL for the main image.
    private String cardImageUrl;

    public String getCardImageUrl() {
        return cardImageUrl;
    }

    public void setCardImageUrl(String cardImageUrl) {
        this.cardImageUrl = cardImageUrl;
    }
As your tips, getter and setter can be automatically generated by Android studio. In the above modification, you just need to declare cardImageUrl member followed by [Alt]+[Insert] and generate getter and setter. See How to automatically generate getters and setters in Android Studio. We also implement a getImageURI function, to convert URL string to URI format.
    public URI getCardImageURI() {
        try {
            return new URI(getCardImageUrl());
        } catch (URISyntaxException e) {
            return null;
        }
    }
CardPresenter takes care of updating image using picasso. This is done by implementing updateCardViewImage function. Picasso makes a source code intuitive to understand for loading, transforming image.
    public ViewHolder(View view) {
        super(view);
        mCardView = (ImageCardView) view;
        mImageCardViewTarget = new PicassoImageCardViewTarget(mCardView);
        mDefaultCardImage = mContext.getResources().getDrawable(R.drawable.movie);
    }

       ...

    protected void updateCardViewImage(URI uri) {
        Picasso.with(mContext)
                .load(uri.toString())
                .resize(Utils.convertDpToPixel(mContext, CARD_WIDTH),
                        Utils.convertDpToPixel(mContext, CARD_HEIGHT))
                .error(mDefaultCardImage)
                .into(mImageCardViewTarget);
    }
}


...

@Override
public void onBindViewHolder(Presenter.ViewHolder viewHolder, Object item) {
    Movie movie = (Movie) item;
    ((ViewHolder) viewHolder).setMovie(movie);

    Log.d(TAG, "onBindViewHolder");
    if (movie.getCardImageUrl() != null) {
        ((ViewHolder) viewHolder).mCardView.setTitleText(movie.getTitle());
        ((ViewHolder) viewHolder).mCardView.setContentText(movie.getStudio());
        ((ViewHolder) viewHolder).mCardView.setMainImageDimensions(CARD_WIDTH, CARD_HEIGHT);
        ((ViewHolder) viewHolder).updateCardViewImage(movie.getCardImageURI());
        //((ViewHolder) viewHolder).mCardView.setMainImage(((ViewHolder) viewHolder).getDefaultCardImage());
    }
}
At the last line of updateCardViewImage it calls into(mImageCardViewTarget) method to load the image to imageview. This target is implemented as follows.
    public static class PicassoImageCardViewTarget implements Target {
        private ImageCardView mImageCardView;

        public PicassoImageCardViewTarget(ImageCardView imageCardView) {
            mImageCardView = imageCardView;
        }

        @Override
        public void onBitmapLoaded(Bitmap bitmap, Picasso.LoadedFrom loadedFrom) {
            Drawable bitmapDrawable = new BitmapDrawable(mContext.getResources(), bitmap);
            mImageCardView.setMainImage(bitmapDrawable);
        }

        @Override
        public void onBitmapFailed(Drawable drawable) {
            mImageCardView.setMainImage(drawable);
        }

        @Override
        public void onPrepareLoad(Drawable drawable) {
            // Do nothing, default_background manager has its own transitions
        }
    }
Interface Target is defined in picasso library, it
represents an arbitrary listener for image loading.
Target interface allows us to implement 3 listener functions.
onBitmapLoaded
– Callback when an image has been successfully loaded.onBitmapFailed
– Callback when an image has been successfully loaded. linked with error()onPrepareLoad
– Callback invoked right before your request is submitted. linked with placeholder()
Remaining task is to specify cardImageUrl from MainFragment, which is done in
    private void loadRows() {

        ...

        for(int i=0; i<10; i++) {
            Movie movie = new Movie();
            movie.setCardImageUrl("http://heimkehrend.raindrop.jp/kl-hacker/wp-content/uploads/2014/08/DSC02580.jpg");
            movie.setTitle("title" + i);
            movie.setStudio("studio" + i);
            cardRowAdapter.add(movie);
        }
         ...
    }
At last, you need to add permission to use Internet in AndroidManifest.xml before building.
<?xml version="1.0" encoding="utf-8"?>
<manifest xmlns:android="http://schemas.android.com/apk/res/android"
    package="com.corochann.androidtvapptutorial" >

    <uses-permission android:name="android.permission.INTERNET" />

    ...
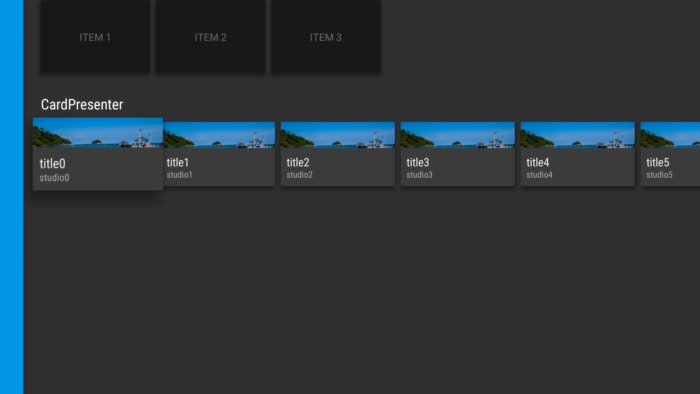
Build and Run 2

Now main image is downloaded from the internet.
Source code is on github.
Customizing ImageCardView, BaseCardView
We can change the design type, and the animation behavior of the card. To begin with, I recommend to refer BaseCardView explanation in source code provided by Android SDK,
A BaseCardView will draw its children based on its type, the region visibilities of the child types, and the state of the widget. A child may be marked as belonging to one of three regions: main, info, or extra. The main region is always visible, while the info and extra regions can be set to display based on the activated or selected state of the View. The card states are set by calling setActivated and setSelected.
In BaseCardView class, you can check the options available to change the design.
public void setCardType(int type)public void setInfoVisibility(int visibility)public void setExtraVisibility(int visibility)
setCardType(int type)
You can use following card type as argument
CARD_TYPE_MAIN_ONLYCARD_TYPE_INFO_OVERCARD_TYPE_INFO_UNDERCARD_TYPE_INFO_UNDER_WITH_EXTRA
The example with ImageCardView

You can check the layout of ImageCardView in SDK folder, \sdk\extras\android\support\v17\leanback\res\layout\lb_image_card_view.xml.
ImageCardView has imageView as main region, and title and content text are in info region. The extra region is not set, therefore the behavior is same between CARD_TYPE_INFO_UNDER and CARD_TYPE_INFO_UNDER_WITH_EXTRA.
setInfoVisibility(int visibility), setExtraVisibility(int visibility)
You can use following card type as argument
CARD_REGION_VISIBLE_ALWAYS
– the region (title & content text area) will always appear.CARD_REGION_VISIBLE_ACTIVATED
– the region will not appear when user is selecting header.
the region will appear when user move to RowsFragment.CARD_REGION_VISIBLE_SELECTED
– the region will not appear when this card/item is not selected.
the region will appear only when the card/item is selected.
The more detail explanation of these options can be referred from SDK source code.
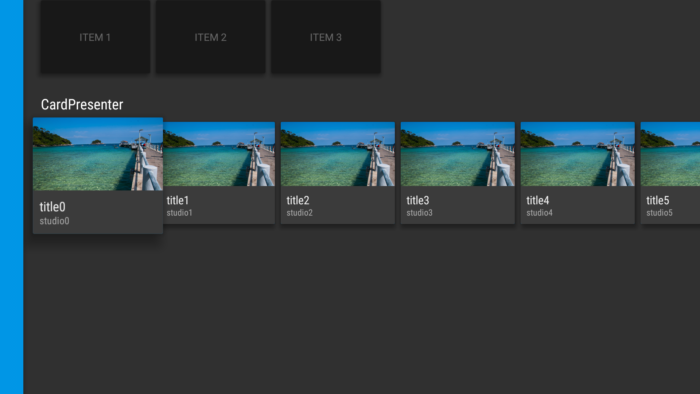
Here I changed the setting by modifying onCreateViewHolder in CardPresenter class,
    @Override
    public ViewHolder onCreateViewHolder(ViewGroup parent) {
        Log.d(TAG, "onCreateViewHolder");
        mContext = parent.getContext();

        ImageCardView cardView = new ImageCardView(mContext);
        cardView.setCardType(BaseCardView.CARD_TYPE_INFO_UNDER);
        cardView.setInfoVisibility(BaseCardView.CARD_REGION_VISIBLE_ALWAYS);
        cardView.setFocusable(true);
        cardView.setFocusableInTouchMode(true);
        cardView.setBackgroundColor(mContext.getResources().getColor(R.color.fastlane_background));
        return new ViewHolder(cardView);
    }
Source code is on github.
Next chapter, PicassoBackgroundManager – Android TV application hands on tutorial 4, is implementing background image update feature.