I started this blog in English, but I’m Japanese and I sometimes want to write some post in Japanese. I added Multi-Language support for this WordPress by using multisite feature which is supported by default WordPress feature. Now Original English site and newly created Japanese site are running on my WordPress.
There are several ways to support multi language in WordPress. Roughly, 4 methods are available and you need to choose best solution based on your requirement and situation.
Install independent WordPress on different server in each country For each language to support, prepare host server in each country and make independent WordPress site. Pros:It is an ideal method for Network traffic. Cons:You need money and man-power to manage each server.
Multisite (This site adopts this) We can build multisite in 1 server, 1 WordPress, by using multisite feature supported by WordPress. And each site can be assigned to each language’s site. We can use following plugins to link each language’s page
Pros:We can manage multisite in 1 server. But each site is independent, so you can customize/optimize the design for each language’s site. Cons:Setup (Theme, plugins, Categories etc) is necessary for each site. It takes time.
Install Multi language plugins If you want to extend some feature in WordPress, you may consider installing plugins. some multi language plugins are also available, for example WPML, qTranslate X, Bogo, Polylang Each plugins are working its own algorithm to link each translation post. So it seems that usually each plugins are not compatible with others. Pros:Installing plugin is easy Cons:When you make multi language posts in one site by using these plugins, it makes some restriction for future extension. Concretely, if you want to change plugin in future, you may have no compatible other plugin in choice.
Use 1 WordPress site without plugin It’s the most simple way, just write post in each language in 1 WordPress. If you are personal blogger, then this solution is the easiest way. Pros:No new setting necessary. Cons:It is difficult to manage your site by each language.
More top solution needs cost, but you can manage sites/posts in each language. I was thinking to adopt solution 3 at first, but when I consider about future extension, it has a concern that it is difficult to change to other plugins. So I adopted 2. “building multisite”.
This time, I will explain the case that one WordPress site was already running and adding new site. Procedure is following
Back up data
Sub domain setting
Enable WordPress multisite feature
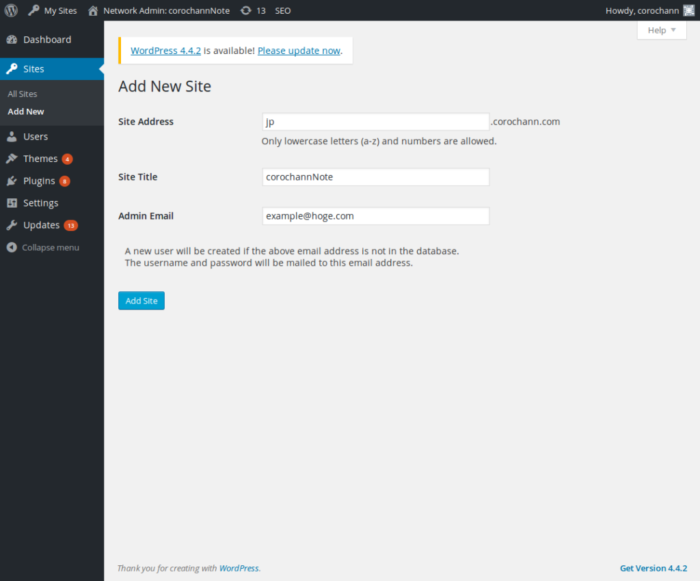
Adding new site
Install/setting Multi Language Switcher plugin
Theme, plugin setting on new site
The process is long compared to just installing a plugin in WordPress.
If you are building new WordPress site, ready to run package is available from BitNami.
Backup WordPress directory, and database. Copy WordPress files from server to local environment and export WordPress database from server.It is better to backup data before begin because you are going to modify wp-config.php and .htaccess files.Note: Enable multisite in WordPress creates new table on Database, and it does not change existing table. So I guess the risk of trouble is not high.
There are 2 methods to create multisite in WordPress
Sub domain type:Mange each site by sub domain, e.g. site1.example.com, site2.example.com
Sub directory type:Manage each site by path, e.g. example.com/site1, example.com/site2
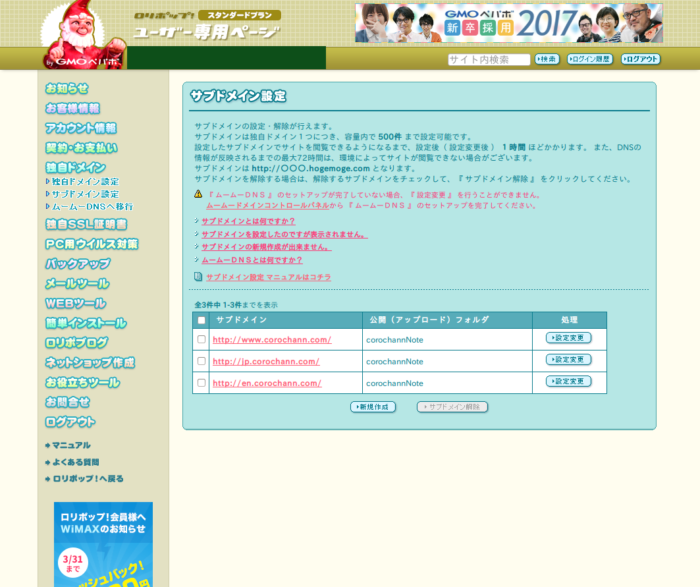
This time I use sub domain type, jp.corochann.com will be used in new site. At first, jp.corochann.com must be linked with existing WordPress. Multisite is handled in same WordPress folder, and eachsite (http://corochann.com and http://jp.corochann.com) can be linked to same WordPress directory. Configure DNS so that jp.corochann.com refers the same place with corochann.com.
This configuration depends on your domain service & web hosting server. Picture below shows my setting in my rental server. After setting done, it is success if you can see the same page with original page by accessing the sub domain URL (Accessing jp.corochann.com returns the same results with corochann.com)
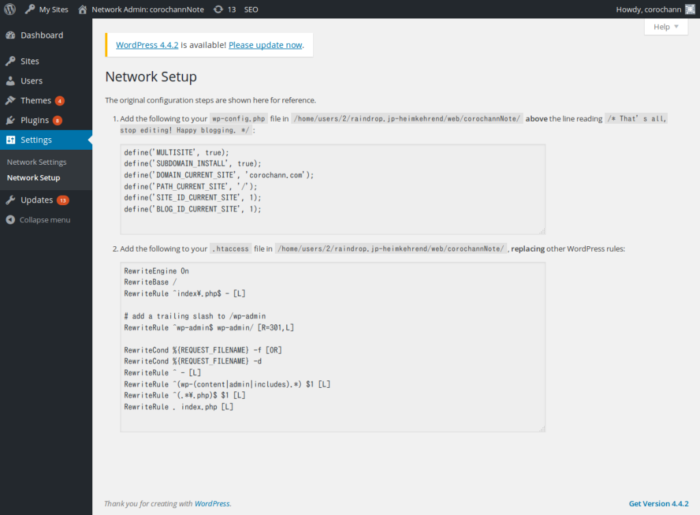
Default setting of WordPress disables multisite. Modify wp-config.php file to enable it. Insert below on top of /* That's all, stop editing! Happy blogging. */.
Before activating plugin, make sure your Site language setting at dashboard. For each site, set proper language by accessing General > Site Language at dashboard.
Plugin install, setup
Installing plugin is available from Network Admin page, not by individual site page. Go to My Sites > Network Admin > Dashboard, and install plugin for whole multisite. Multi Language Switcher can be searched & installed in usual way of installing plugin, Dashboard > Plugins > Add New
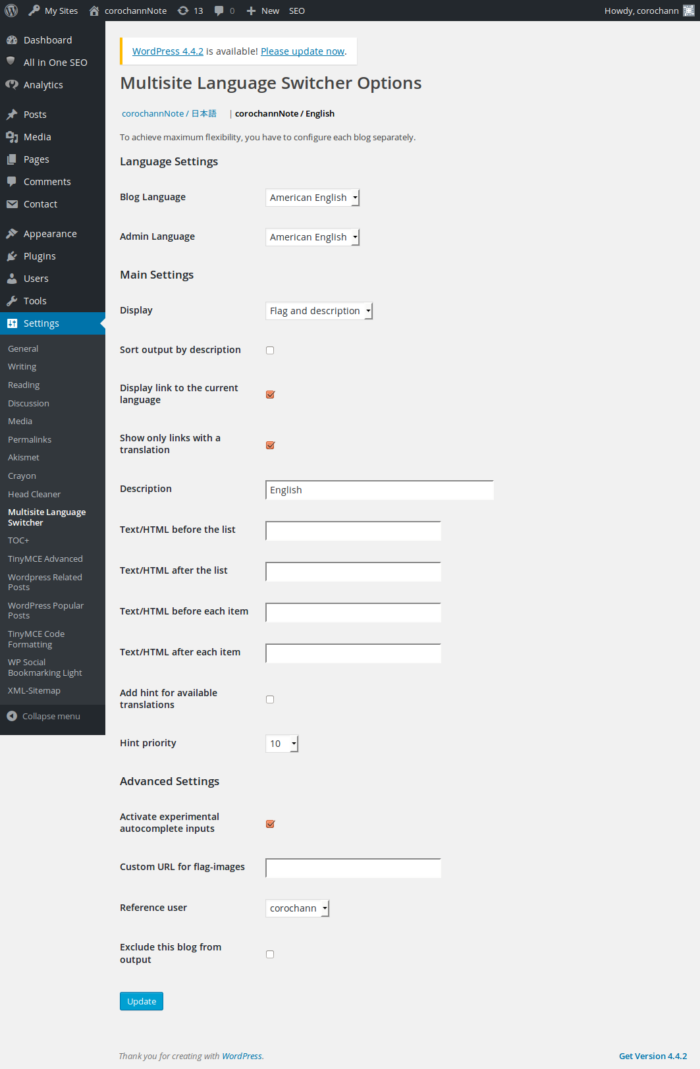
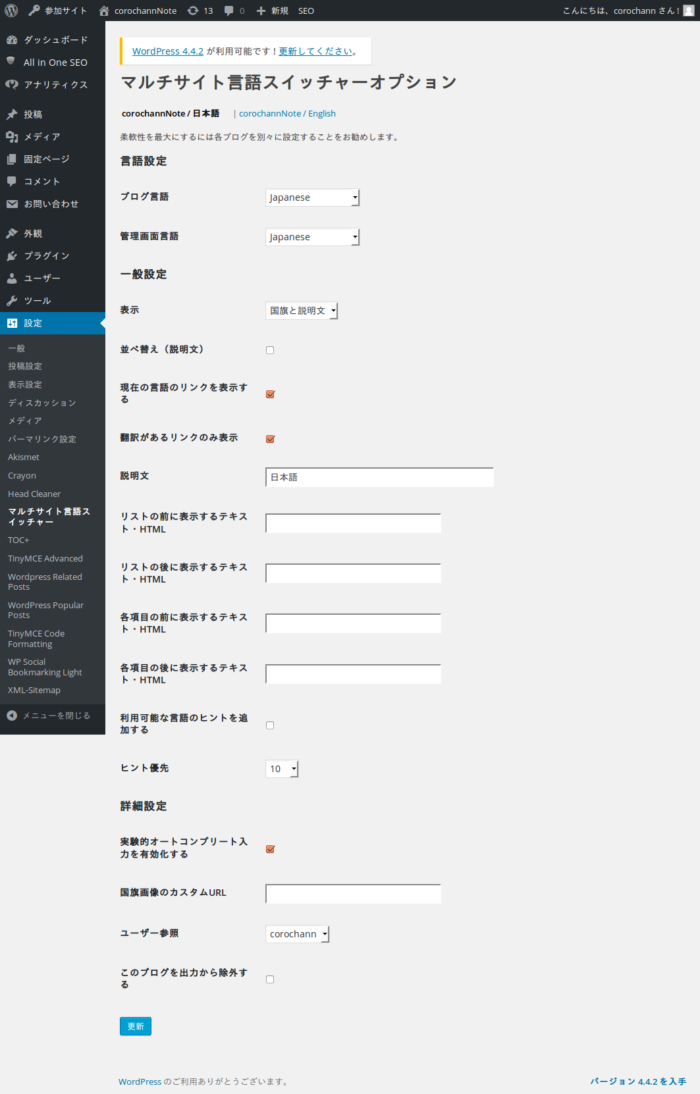
Plugin must be Activated in each site. Configuration can be changed at Dashboard Settings > Multi Language Switcher.
English site setting
Japanese site setting
Place a widget at Theme customize
Language switch button don’t appear when only plugin is Activated. Go to Appearance > Customize to add Multi Language Switcher widget.
This is an example where Flag and description is shown in the widget.
Link translated post for each post
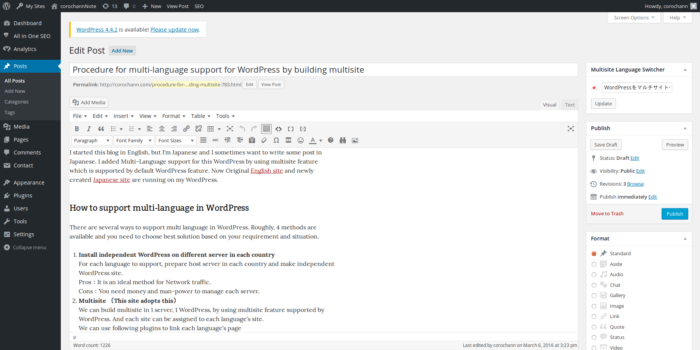
Translate page between English site (http://corochann.com) and Japanese site (http://jp.corochann.com) can be linked manually for each post. (If you have no translation post, it is ok just no need to link.)
For edit post page, new field is created at top right by multi language switcher to link each posts in each site via langualge.
That’s all for Multi Language Switcher setting.
Theme, plugin setting etc for new site
Finally, many configuration is necessary for new site since it is still default setting. To start with, below items should be setup based on your original page.