[updated 2015.11.16]: Revise (sentence structure refactoring).
Contents
Android TV application development introduction
Currently, we have still not enough introduction for Android TV application development yet. In this series of tutorial, I will introduce how to develop Android TV application.
The aim of this post is to understand Android “TV” specific code implementation, especially focusing on UI implementaion.
Because UI is one of the biggest difference between Android phone app and Android TV app. We need to make UI suitable for TV usage, for example we should make an app so that we can navigate the application only using ↑↓→← direction keys, instead of touchpad navigation. Because user uses remote controller, and cannot use “touch screen” function with TV. To achieve this requirement, Android open source project is providing Leanback Support library (android.support.v17.leanback) so that developers can easily implement UI which satisfies these requirements and thus suitable for TV usage. This tutorial mainly explain the usage of this Leanback library.
The target of this post is people those who,,,
- developed Android app before, but not familiar with Android TV app.
- begginer – intermediate level
Since Eclipse support will be finished at the end of 2015, Android studio will be used for the IDE to develop Android TV apps (So please download and setup Android studio, if you have not yet done!). Note that most of the code introduced here is from AOSP android TV sample source code. Basically this tutorial is just detail explanation of this sample source code. Let’s begin.
Launch new Android TV application
Launch Android studio,
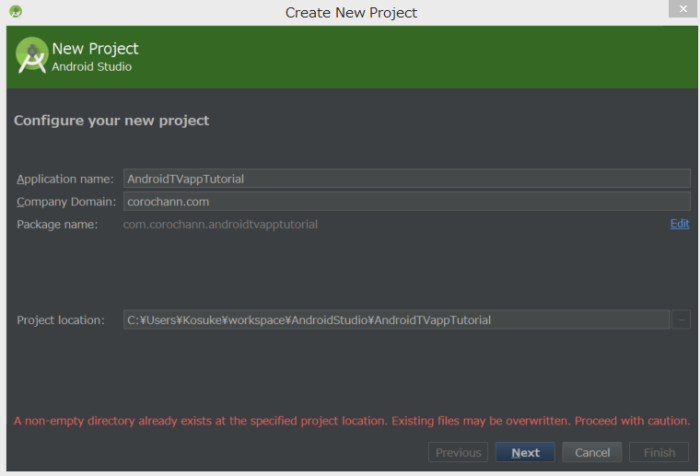
New project
Application name: AndroidTVappTutorial
Company Domain: corochann.com ( or you can use your own domain name )
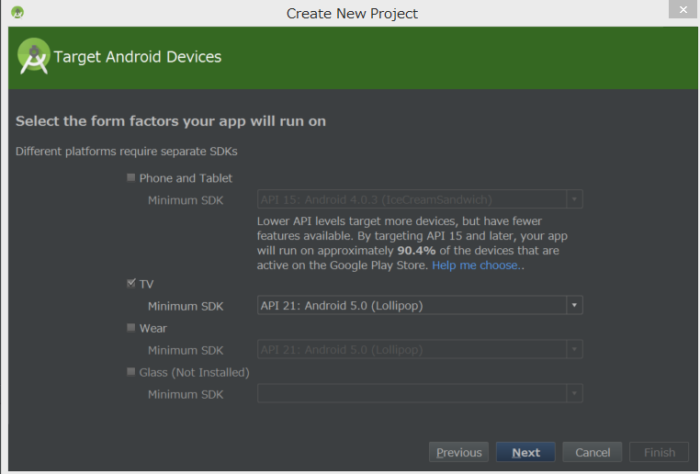
Target Android Devices
Add an activity to TV
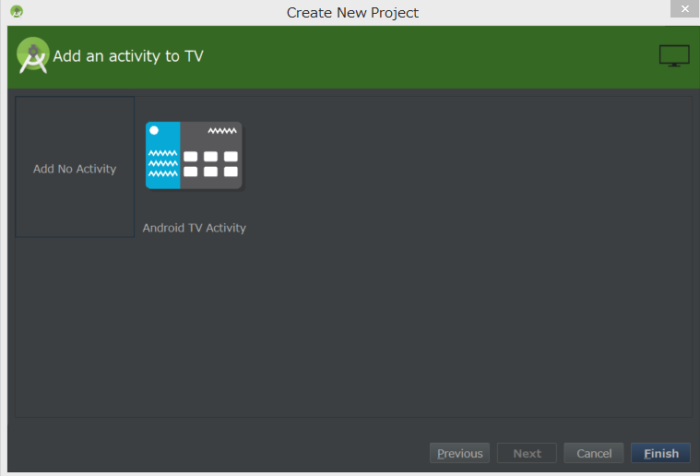
Select “Add No Activity” and Finish
Android studio automatically generate the source codes to start this Tutorial.
The source code of this phase is uploaded on github.
Add activity
At first, let’s make activity. Right click on “com.corochann.androidtvapptutorial”, and choose
New -> Activity -> Blank activity
Check “Launcher Activity”.
I will start from making blank activity, named “MainActivity“.
Android studio now generate 2 files, Java class & layout/activity_main.xml. (we don’t use res/menu/menu_main.xml)
* Note: We can also find “Android TV activity”. When you select this, it will create too match files at the same time. It’s a really helpful reference, but difficult to understand what kind of functions each files takes care of. So I will create these files from scratch in this post so that we can understand each source code’s responsibility. Many of the implementation in this post is referencing this official sample program.
Next, we want to design UI of MainActivity by creating MainFragment.
Add fragment
Right click on the package name (in my case com.corochann.androidtvapptutorial)
New -> Java Class -> Name: MainFragment
* Instead of above procedure, if we choose New -> Fragment -> Blank fragment Uncheck “Create layout XML?”, it makes too match sample source code.
First, modify activity_main.xml as follows so that it only displays mainfragment.
* Click right-top “<>” icon on the code, if you want to copy & paste.
<?xml version="1.0" encoding="utf-8"?>
<fragment xmlns:android="http://schemas.android.com/apk/res/android"
    xmlns:app="http://schemas.android.com/apk/res-auto"
    xmlns:tools="http://schemas.android.com/tools" android:id="@+id/main_browse_fragment"
    android:name="com.corochann.androidtvapptutorial.MainFragment" android:layout_width="match_parent"
    android:layout_height="match_parent" tools:context=".MainActivity" tools:deviceIds="tv"
    tools:ignore="MergeRootFrame" />
Second modify MainFragment as follows.
We will make this MainFragment as a sub-class of BrowseFragment.
BrowseFragment class is supplied by Android SDK Leanback library, and it creates standard UI for Android TV application which we will see through this Tutorial.
package com.corochann.helloandroidtvfromscrach;

import android.os.Bundle;
import android.support.v17.leanback.app.BrowseFragment;
import android.util.Log;

public class MainFragment extends BrowseFragment {
    private static final String TAG = MainFragment.class.getSimpleName();

    @Override
    public void onActivityCreated(Bundle savedInstanceState) {
        Log.i(TAG, "onActivityCreated");
        super.onActivityCreated(savedInstanceState);

    }
}
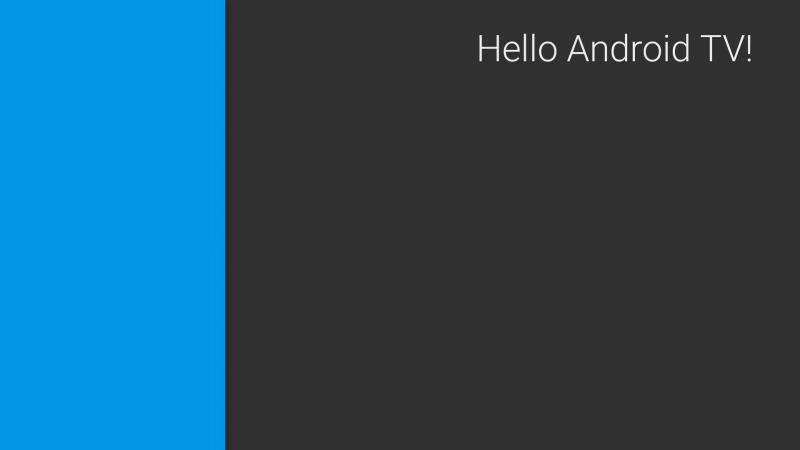
(I) Build and Run it!

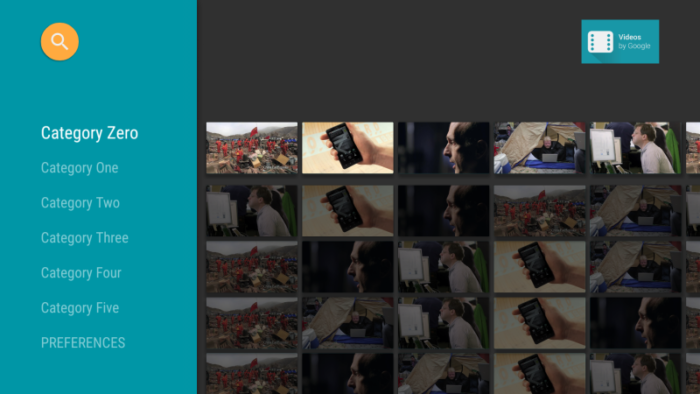
BrowseFragment consists of HeadersFragment & RowsFragment.
Here, you can see HeaderFragment (header) part at the right side, and RowsFragment (contents) part at the left side. We will design this Header & Row combination in the following.
Before that, let’s implement UI for main color & title of this application.
source code until here is uploaded on github.
Adding setupUIElements() to MainFragment.java
We will add setupUIElements() method inside MainFragment.java, to set up application information.
@Override
public void onActivityCreated(Bundle savedInstanceState) {
Log.i(TAG, "onActivityCreated");
super.onActivityCreated(savedInstanceState);
setupUIElements();
}
private void setupUIElements() {
// setBadgeDrawable(getActivity().getResources().getDrawable(R.drawable.videos_by_google_banner));
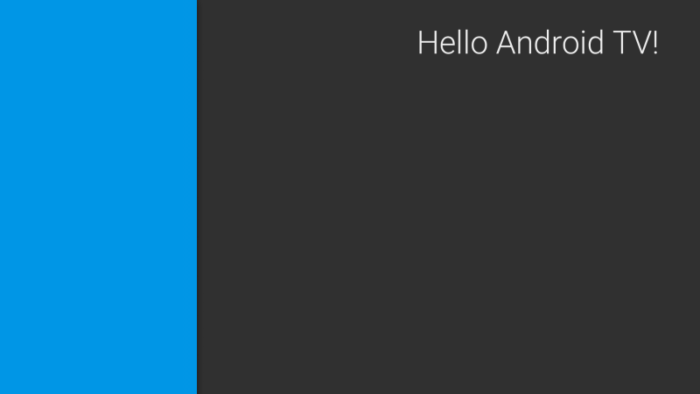
setTitle("Hello Android TV!"); // Badge, when set, takes precedent
// over title
setHeadersState(HEADERS_ENABLED);
setHeadersTransitionOnBackEnabled(true);
// set fastLane (or headers) background color
setBrandColor(getResources().getColor(R.color.fastlane_background));
// set search icon color
setSearchAffordanceColor(getResources().getColor(R.color.search_opaque));
}
We have set
- Application title or Application icon
- Brand color
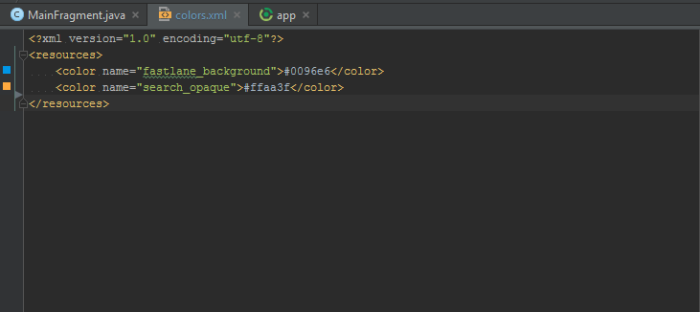
Color information is referenced from colors.xml, which we haven’t made yet. Right click res/values and choose
New -> values Resource file
File name: colors.xml -> “OK”
Write below.
<?xml version="1.0" encoding="utf-8"?>
<resources>
    <color name="fastlane_background">#0096e6</color>
    <color name="search_opaque">#ffaa3f</color>
</resources>
(II) Build and Run!
Now you can see title is shown on top-right, and header color = BrandColor on left side has changed.
You can also use setBadgeDrawable() method instead of setTitle() method. As written in the comments of above code as “Badge, when set, takes precedent”, the title will change to logo if setBadgeDrawable() is used (See below picture). You can set either one of “title logo icon” by setBadgeDrawable or “title string” by setTitle.
Source code until here is uploaded on github.
Modify Android Manifest.
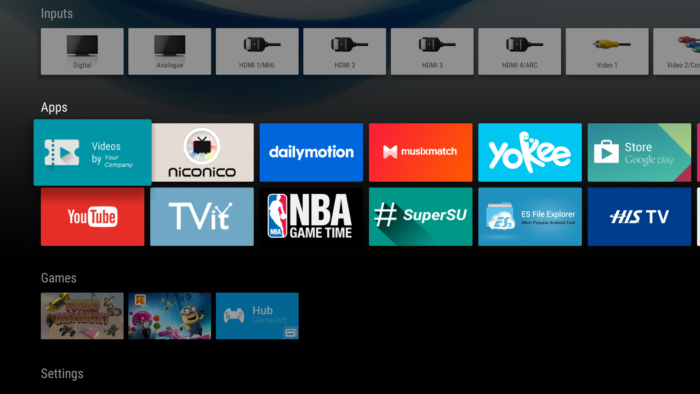
You may notice that application icon will not be shown in your Leanback Launcher (Android TV home launcher app) until now.
We need some declaration in our app to be considered as Android TV app. Modify AndroidManifest.xml as following.
<?xml version="1.0" encoding="utf-8"?>
<manifest xmlns:android="http://schemas.android.com/apk/res/android"
    package="com.corochann.androidtvapptutorial" >


    <!-- TV app need to declare touchscreen not required -->
    <uses-feature
        android:name="android.hardware.touchscreen"
        android:required="false" />

    <!--
     true:  your app runs on only TV
     false: your app runs on phone and TV -->
    <uses-feature
        android:name="android.software.leanback"
        android:required="true" />


    <application
        android:allowBackup="true"
        android:icon="@mipmap/ic_launcher"
        android:label="@string/app_name"
        android:theme="@style/Theme.Leanback" >
        <activity
            android:name=".MainActivity"
            android:icon="@drawable/app_icon_your_company"
            android:label="@string/app_name"
            android:logo="@drawable/app_icon_your_company" >
            <intent-filter>
                <action android:name="android.intent.action.MAIN" />

                <category android:name="android.intent.category.LEANBACK_LAUNCHER" />
            </intent-filter>
        </activity>
    </application>

</manifest>
and I put app_icon_your_compan.png in main/res/drawble/ folder.
(III) Build and Run!
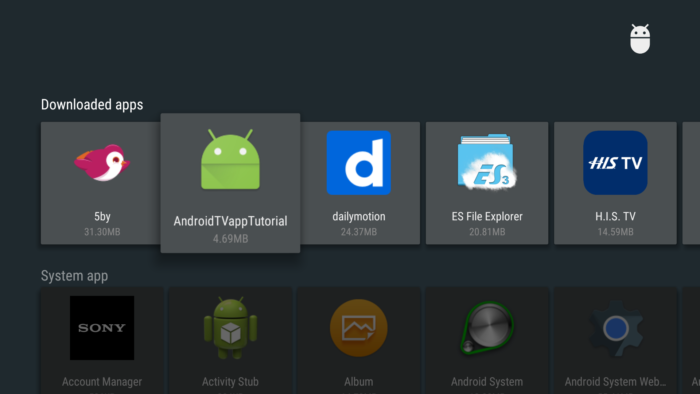
To show activity icon in Leanback launcher
You can show activity icon in Leanback launcher by declaring intent-filter.
<category android:name="android.intent.category.LEANBACK_LAUNCHER" />
Also, the icon is specified in activity tag,
        <activity
            android:name=".MainActivity"
            android:icon="@drawable/app_icon_your_company"
            android:label="@string/app_name"
            android:logo="@drawable/app_icon_your_company" >

            ...
To show application icon in Leanback launcher
You can show application icon by declaring,
    <application
        android:allowBackup="true"
        android:icon="@mipmap/ic_launcher"
        android:label="@string/app_name"
        android:theme="@style/Theme.Leanback" >

        ...
Note that activity icon and application icon are different.
For the Android manifest setting for Android TV, please refer details in official Android developers page.
Next chapter, Construction of BrowseFragment – Android TV application hands on tutorial 2, I will explain notion of BrowseFragment, HeadersFragment, RowsFragment, Adapter and Presenter to show selectable objects in our app.
hi,
I need to set up an Android TV to display movies in a local network environment, which will list and display all the movies in a folder by connecting to an IP.
How do I access a dynamic list from a folder instead of displaying movies from a fixed URL?
please help me!
This is a great breakdown — thanks for taking the time to document each step so clearly. I remember when I first started experimenting with Android TV apps, getting the Leanback library configured properly was a bit confusing, especially when it came to customizing the BrowseFragment and understanding how headers and rows interact.
Your explanation about separating MainActivity and MainFragment from scratch is super helpful; the auto-generated “Android TV Activity” template can definitely feel overwhelming for beginners. One small tip for anyone following along: if you’re testing on an emulator, make sure you create a TV device profile in Android Studio; otherwise, some Leanback components may not render correctly.
Looking forward to the next tutorial — especially the part about Adapters and Presenters in BrowseFragment. That’s where things really start to come alive visually on TV apps.