The code structure of inference/predict stage is quite similar to MNIST inference code, please read this for precise explanation.
Here, I will simply put the code and its results.
CIFAR-10 inference code
Code is uploaded on github as predict_cifar10.py.
"""Inference/predict code for CIFAR-10

model must be trained before inference,
train_cifar10.py must be executed beforehand.
"""
from __future__ import print_function
import os
import argparse

import numpy as np
import matplotlib
matplotlib.use('Agg')
import matplotlib.pyplot as plt
import chainer
import chainer.functions as F
import chainer.links as L
from chainer import training, iterators, serializers, optimizers, Variable, cuda
from chainer.training import extensions

from CNNSmall import CNNSmall
from CNNMedium import CNNMedium

CIFAR10_LABELS_LIST = [
    'airplane',
    'automobile',
    'bird',
    'cat',
    'deer',
    'dog',
    'frog',
    'horse',
    'ship',
    'truck'
]


def main():
    archs = {
        'cnnsmall': CNNSmall,
        'cnnmedium': CNNMedium,
    }

    parser = argparse.ArgumentParser(description='Cifar-10 CNN predict code')
    parser.add_argument('--arch', '-a', choices=archs.keys(),
                        default='cnnsmall', help='Convnet architecture')
    #parser.add_argument('--batchsize', '-b', type=int, default=64,
    #                    help='Number of images in each mini-batch')
    parser.add_argument('--modelpath', '-m', default='result-cifar10-cnnsmall/cnnsmall-cifar10.model',
                        help='Model path to be loaded')
    parser.add_argument('--gpu', '-g', type=int, default=-1,
                        help='GPU ID (negative value indicates CPU)')
    args = parser.parse_args()

    print('GPU: {}'.format(args.gpu))
    #print('# Minibatch-size: {}'.format(args.batchsize))
    print('')

    # 1. Setup model
    class_num = 10
    model = archs[args.arch](n_out=class_num)
    classifier_model = L.Classifier(model)
    if args.gpu >= 0:
        chainer.cuda.get_device(args.gpu).use()  # Make a specified GPU current
        classifier_model.to_gpu()  # Copy the model to the GPU
    xp = np if args.gpu < 0 else cuda.cupy

    serializers.load_npz(args.modelpath, model)

    # 2. Load the CIFAR-10 dataset
    train, test = chainer.datasets.get_cifar10()

    basedir = 'images'
    plot_predict_cifar(os.path.join(basedir, 'cifar10_predict.png'), model,
                       train, 4, 5, scale=5., label_list=CIFAR10_LABELS_LIST)


def plot_predict_cifar(filepath, model, data, row, col,
                       scale=3., label_list=None):
    fig_width = data[0][0].shape[1] / 80 * row * scale
    fig_height = data[0][0].shape[2] / 80 * col * scale
    fig, axes = plt.subplots(row,
                             col,
                             figsize=(fig_height, fig_width))
    for i in range(row * col):
        # train[i][0] is i-th image data with size 32x32
        image, label_index = data[i]
        xp = cuda.cupy
        x = Variable(xp.asarray(image.reshape(1, 3, 32, 32)))    # test data
        #t = Variable(xp.asarray([test[i][1]]))  # labels
        y = model(x)                              # Inference result
        prediction = y.data.argmax(axis=1)
        image = image.transpose(1, 2, 0)
        print('Predicted {}-th image, prediction={}, actual={}'
              .format(i, prediction[0], label_index))
        r, c = divmod(i, col)
        axes[r][c].imshow(image)  # cmap='gray' is for black and white picture.
        if label_list is None:
            axes[r][c].set_title('Predict:{}, Answer: {}'
                                 .format(label_index, prediction[0]))
        else:
            pred = int(prediction[0])
            axes[r][c].set_title('Predict:{} {}\nAnswer:{} {}'
                                 .format(label_index, label_list[label_index],
                                         pred, label_list[pred]))
        axes[r][c].axis('off')  # do not show axis value
    plt.tight_layout(pad=0.01)   # automatic padding between subplots
    plt.savefig(filepath)
    print('Result saved to {}'.format(filepath))


if __name__ == '__main__':
    main()
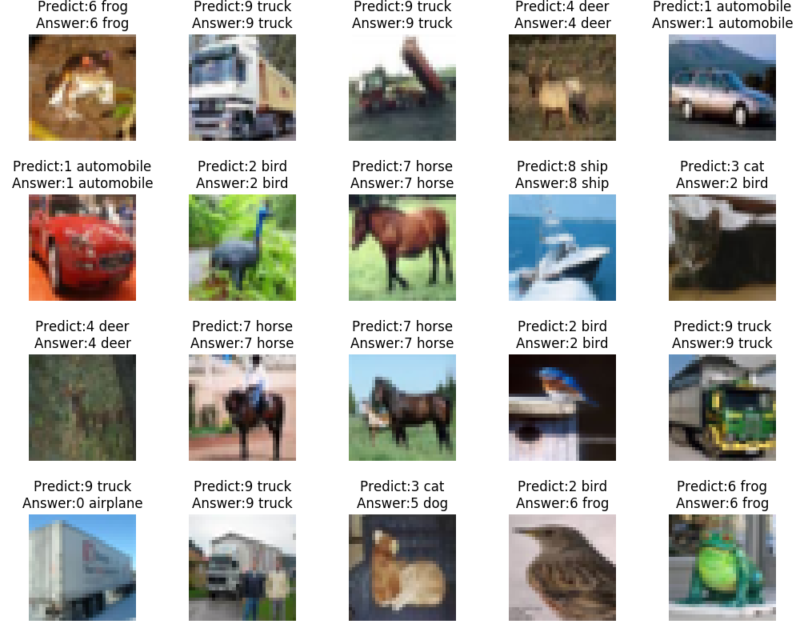
This outputs the result as,

You can see that even small CNN, it successfully classifies most of the images. Of course this is just a simple example and you can improve the model accuracy by tuning the deep neural network!
CIFAR-100 inference code
In the same way, code is uploaded on github as predict_cifar100.py.
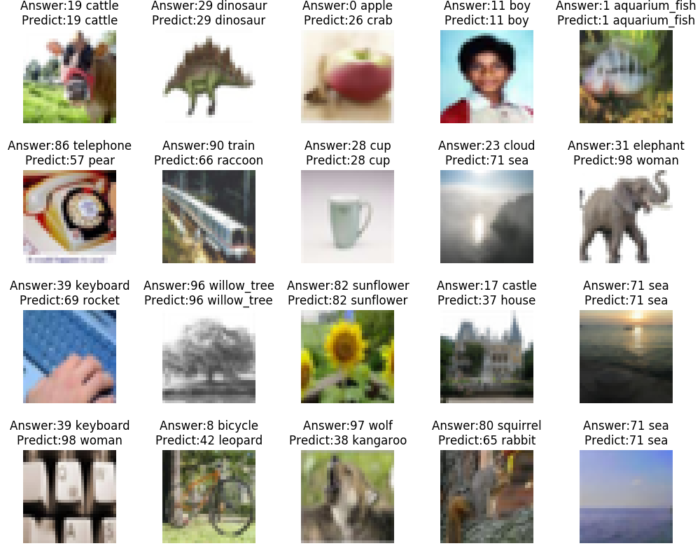
CIFAR-100 is more difficult than CIFAR-10 in general because there are more class to classify but exists fewer number of training image data.
Again, the accuracy can be improved by tuning the deep neural network model, try it!
That’s all for understanding CNN, next is to understand RNN, LSTM used in Natual Language Processing.